 Tutorial Guide
Tutorial Guide
Tutorial Guide
Assign filaments to 3D printing cuties for clean, multi-colour prints.
Each DigiMarvels 3MF is already split into individual parts (body, spots, eyes…) so you can give each one its own colour. To change a colour, select the part first, then assign a filament to it.
Parts are already separated, so assigning filaments with the steps below gives you clean, accurate multicolor printing — no guesswork needed.
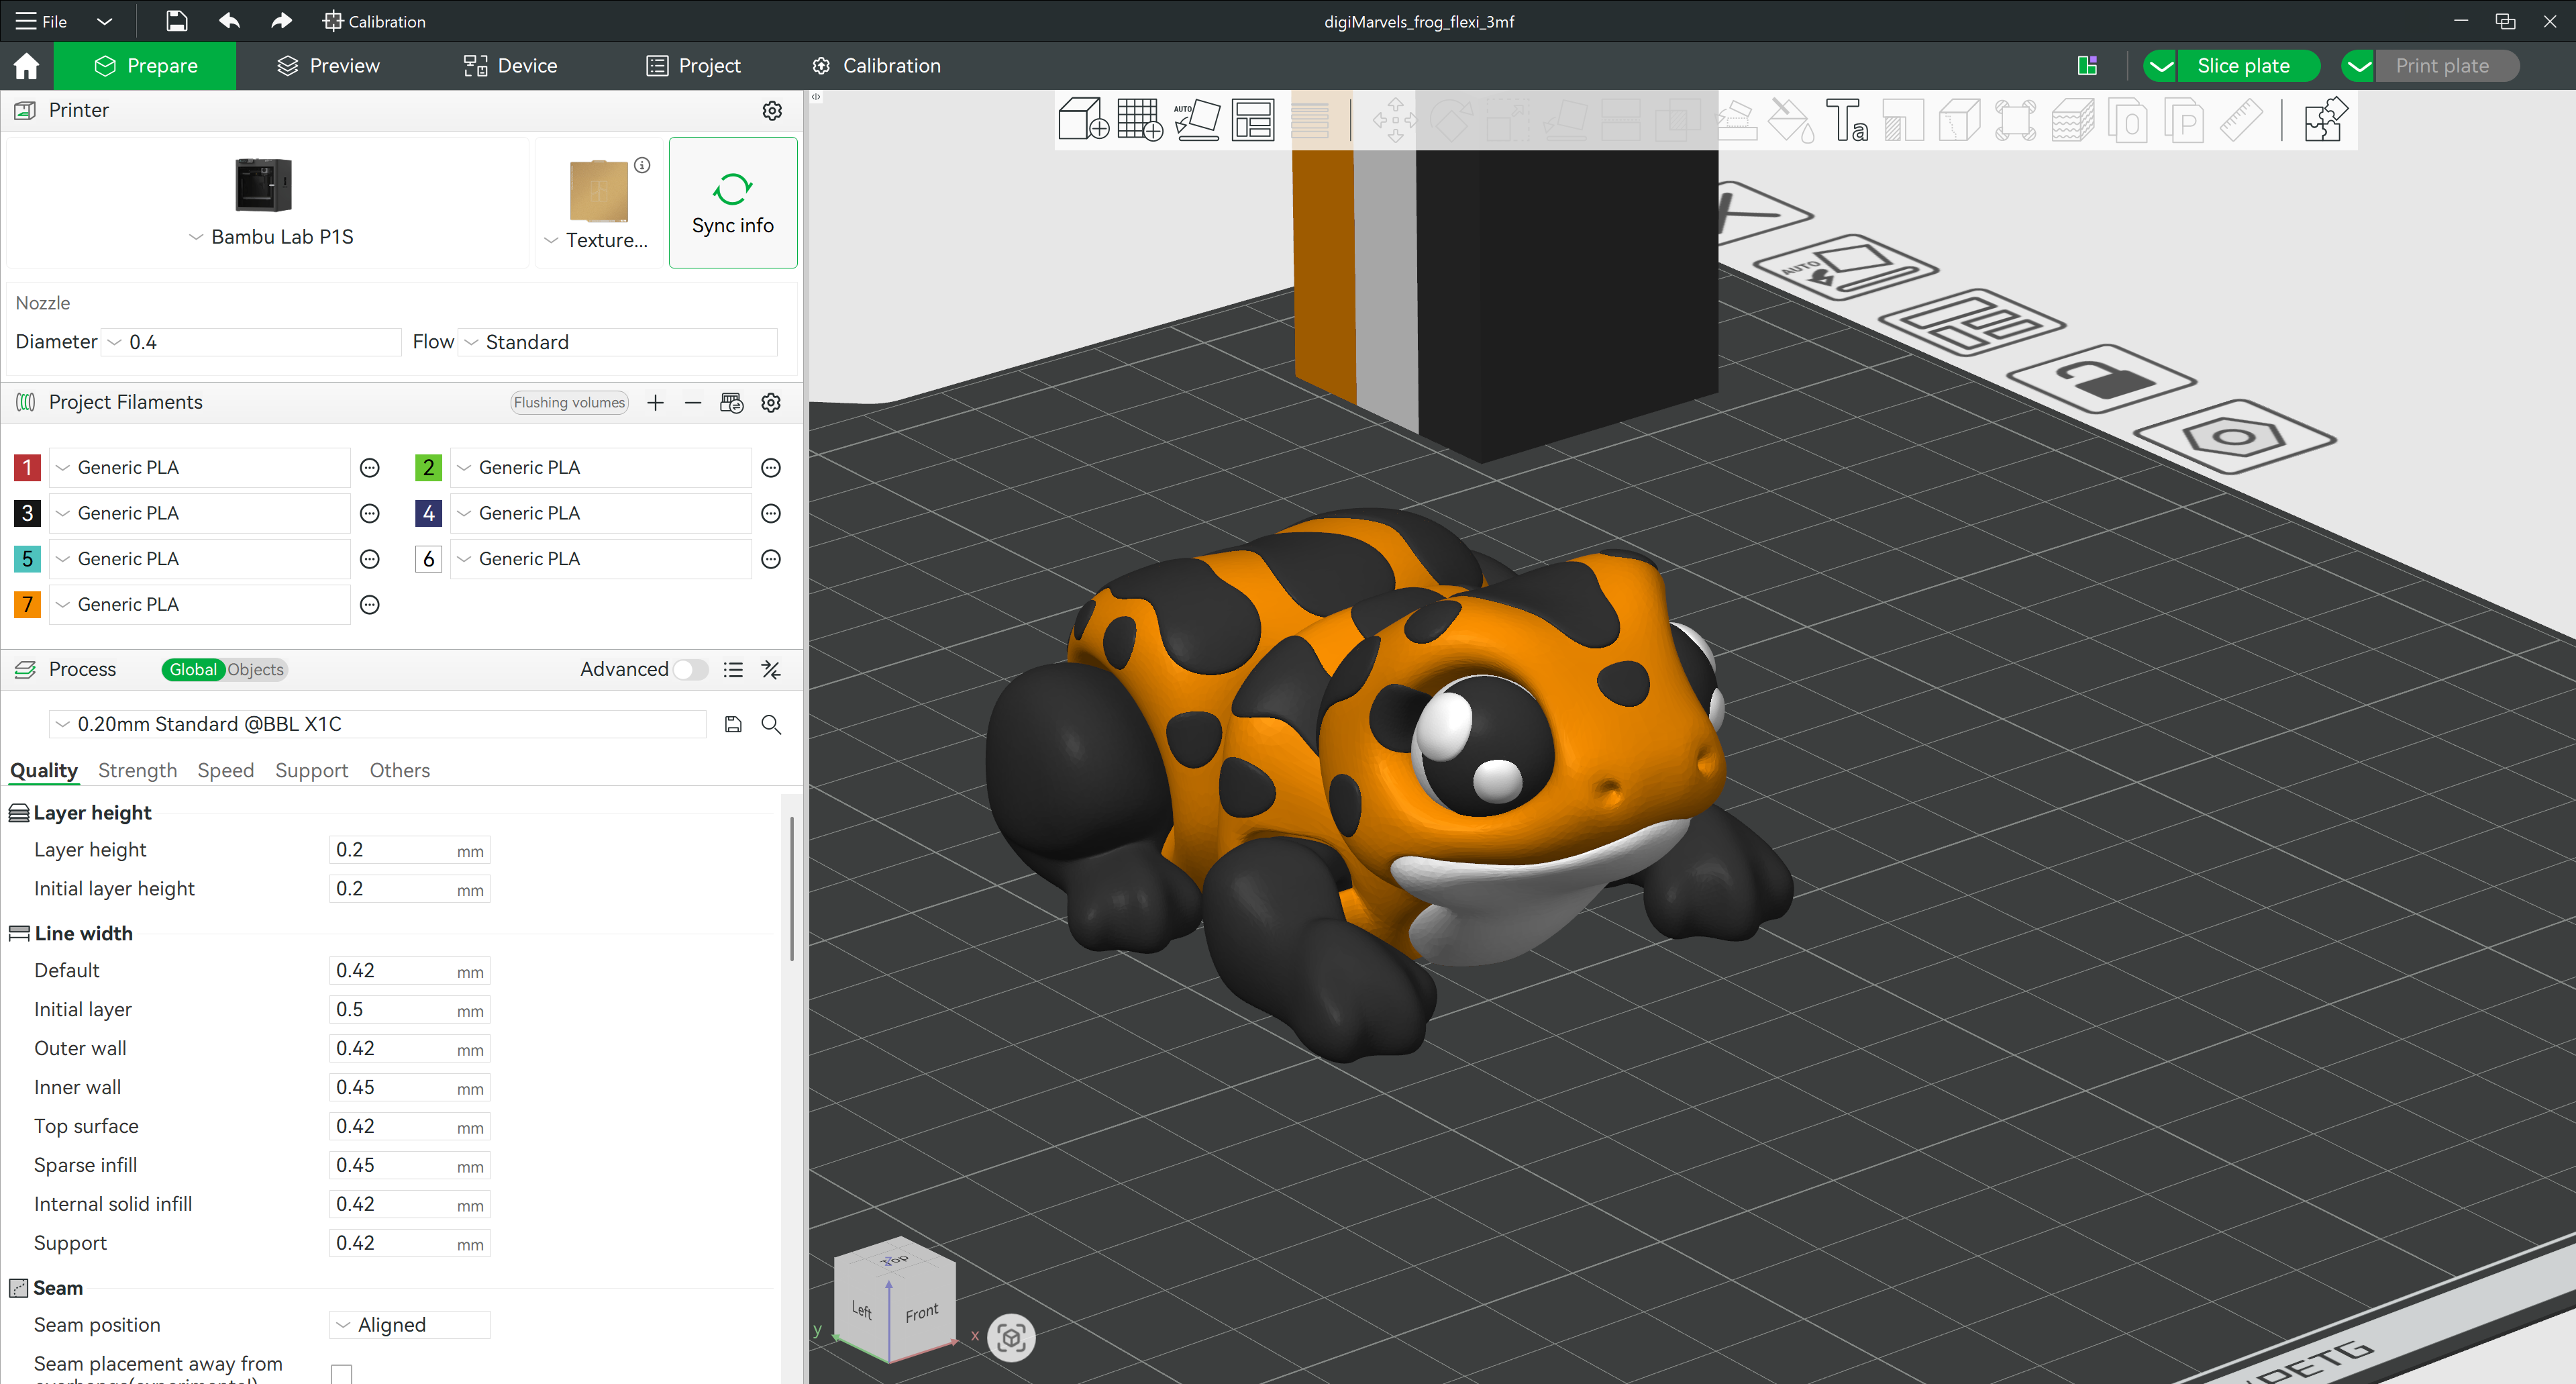
Open Bambu Studio and go to File → Import → Import 3MF. The model will appear on the build plate with all its coloured parts already set up.
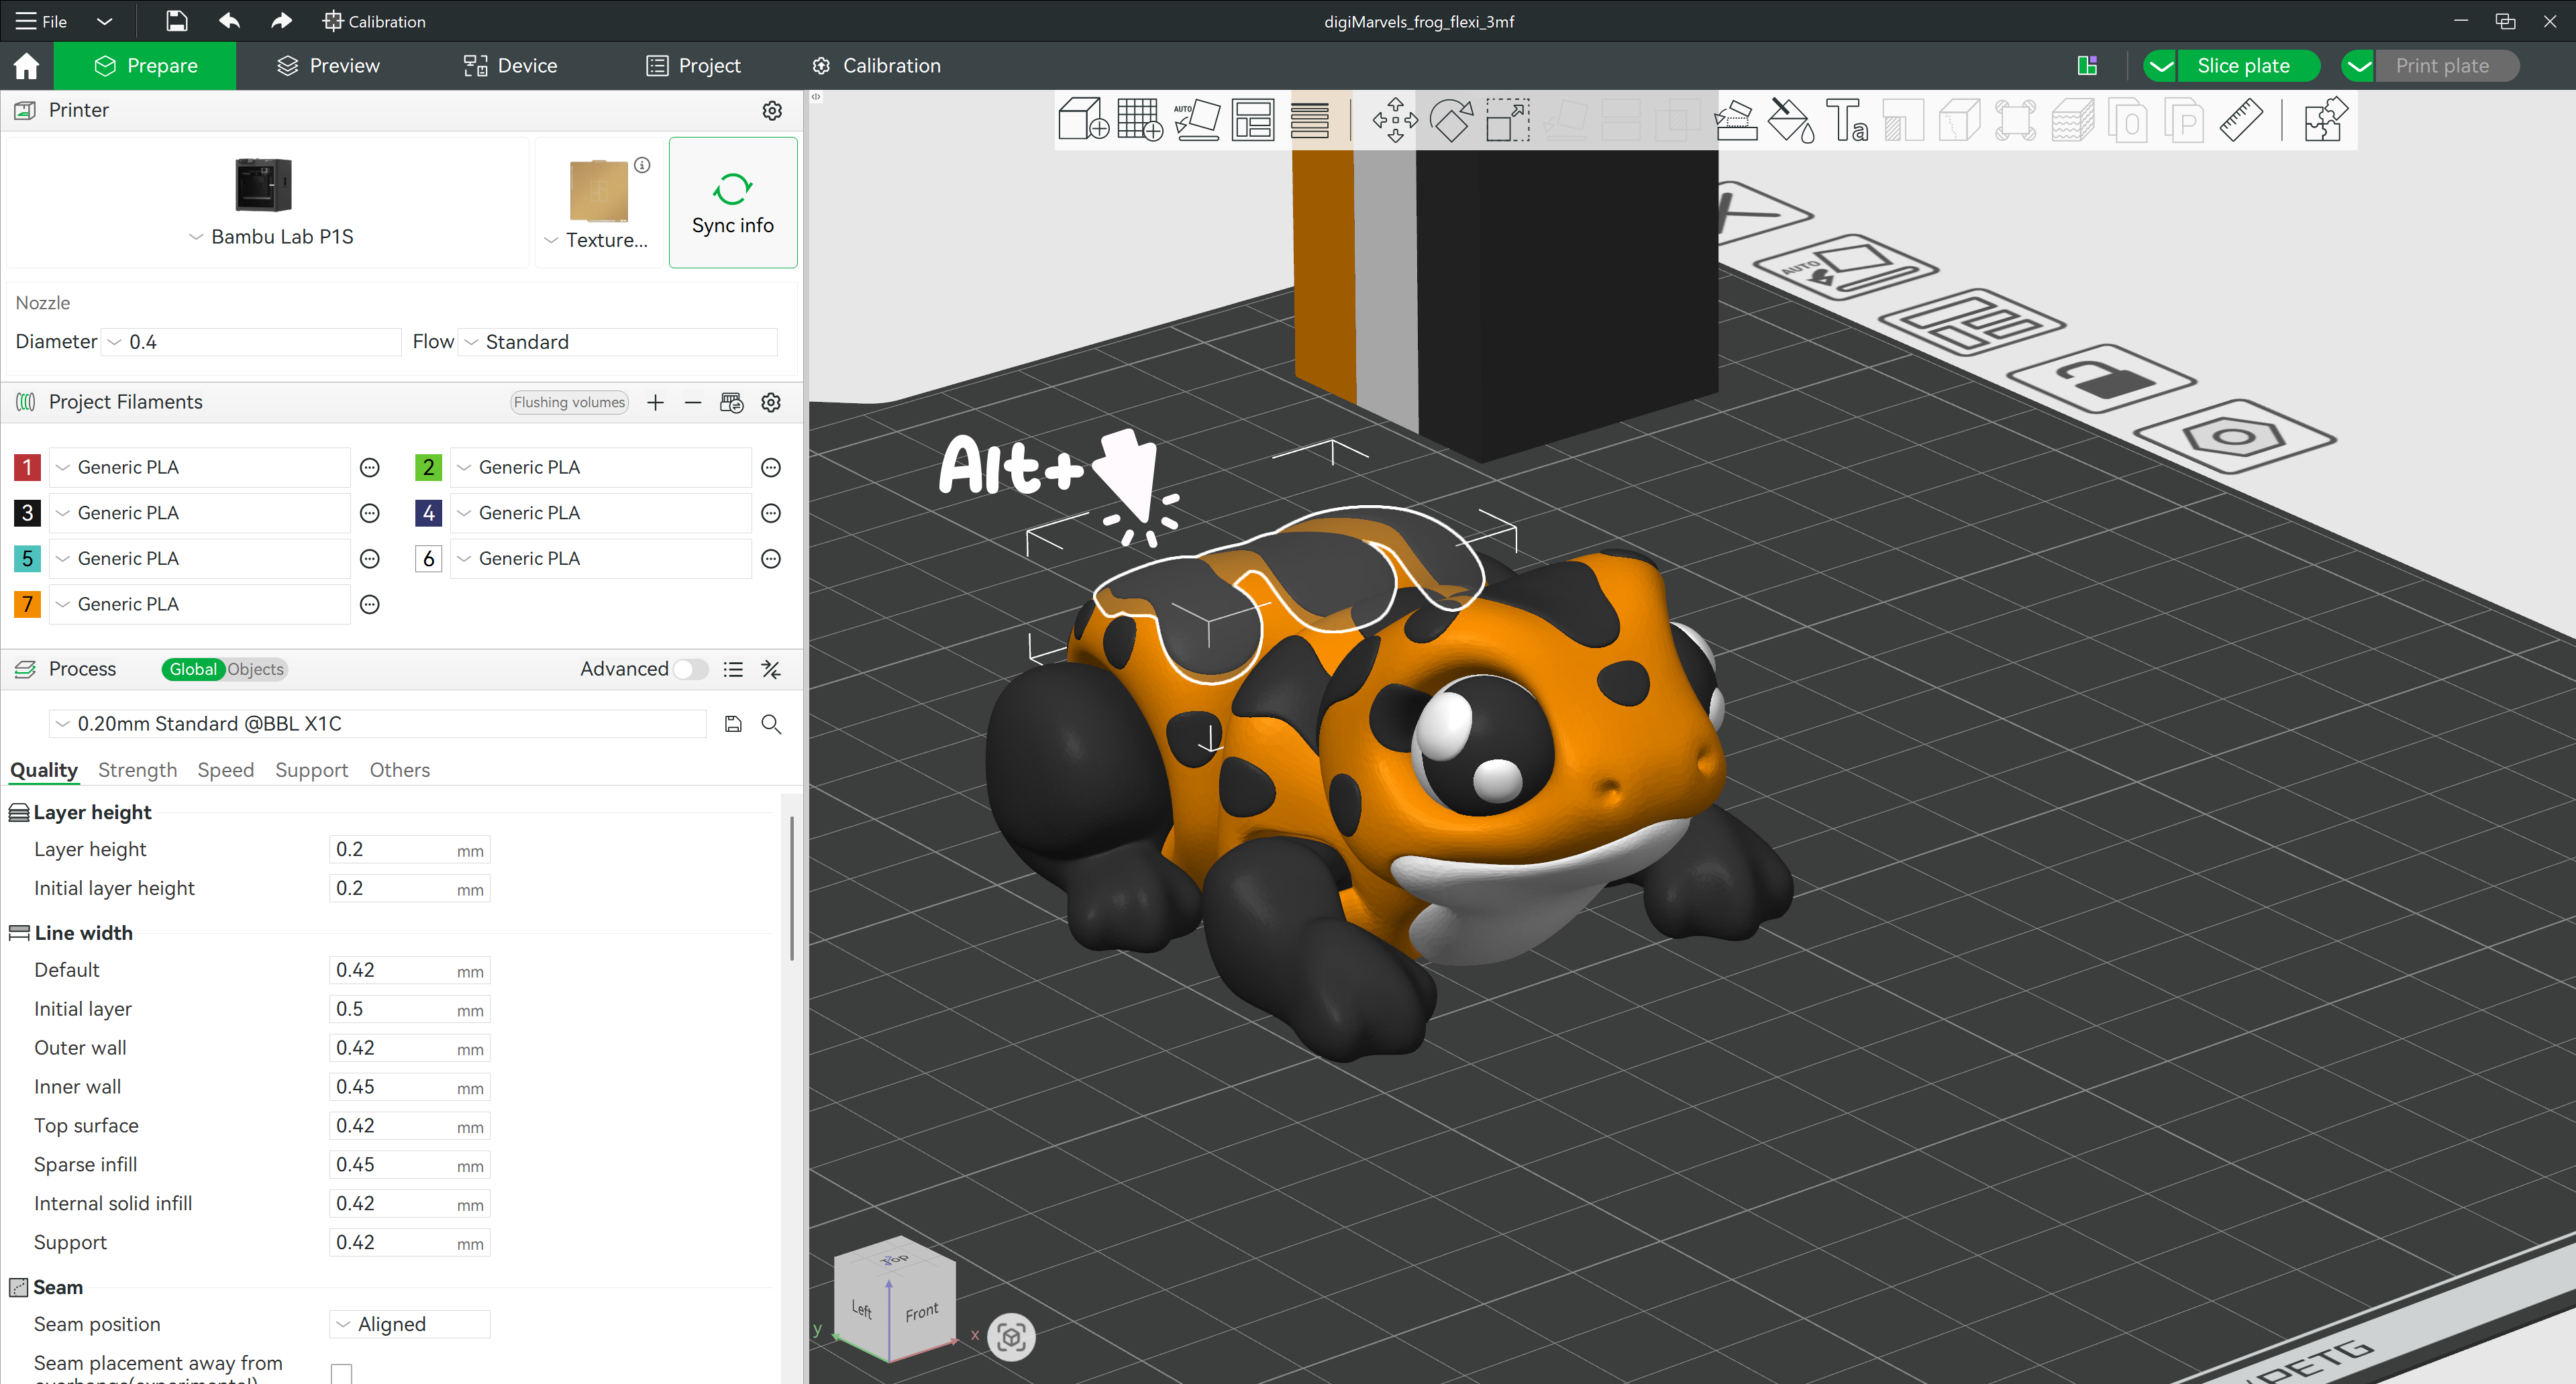
Hold Alt and Left Click on the part you want to recolour — it will highlight when selected. Keep holding Alt and click more parts to select multiple at once.
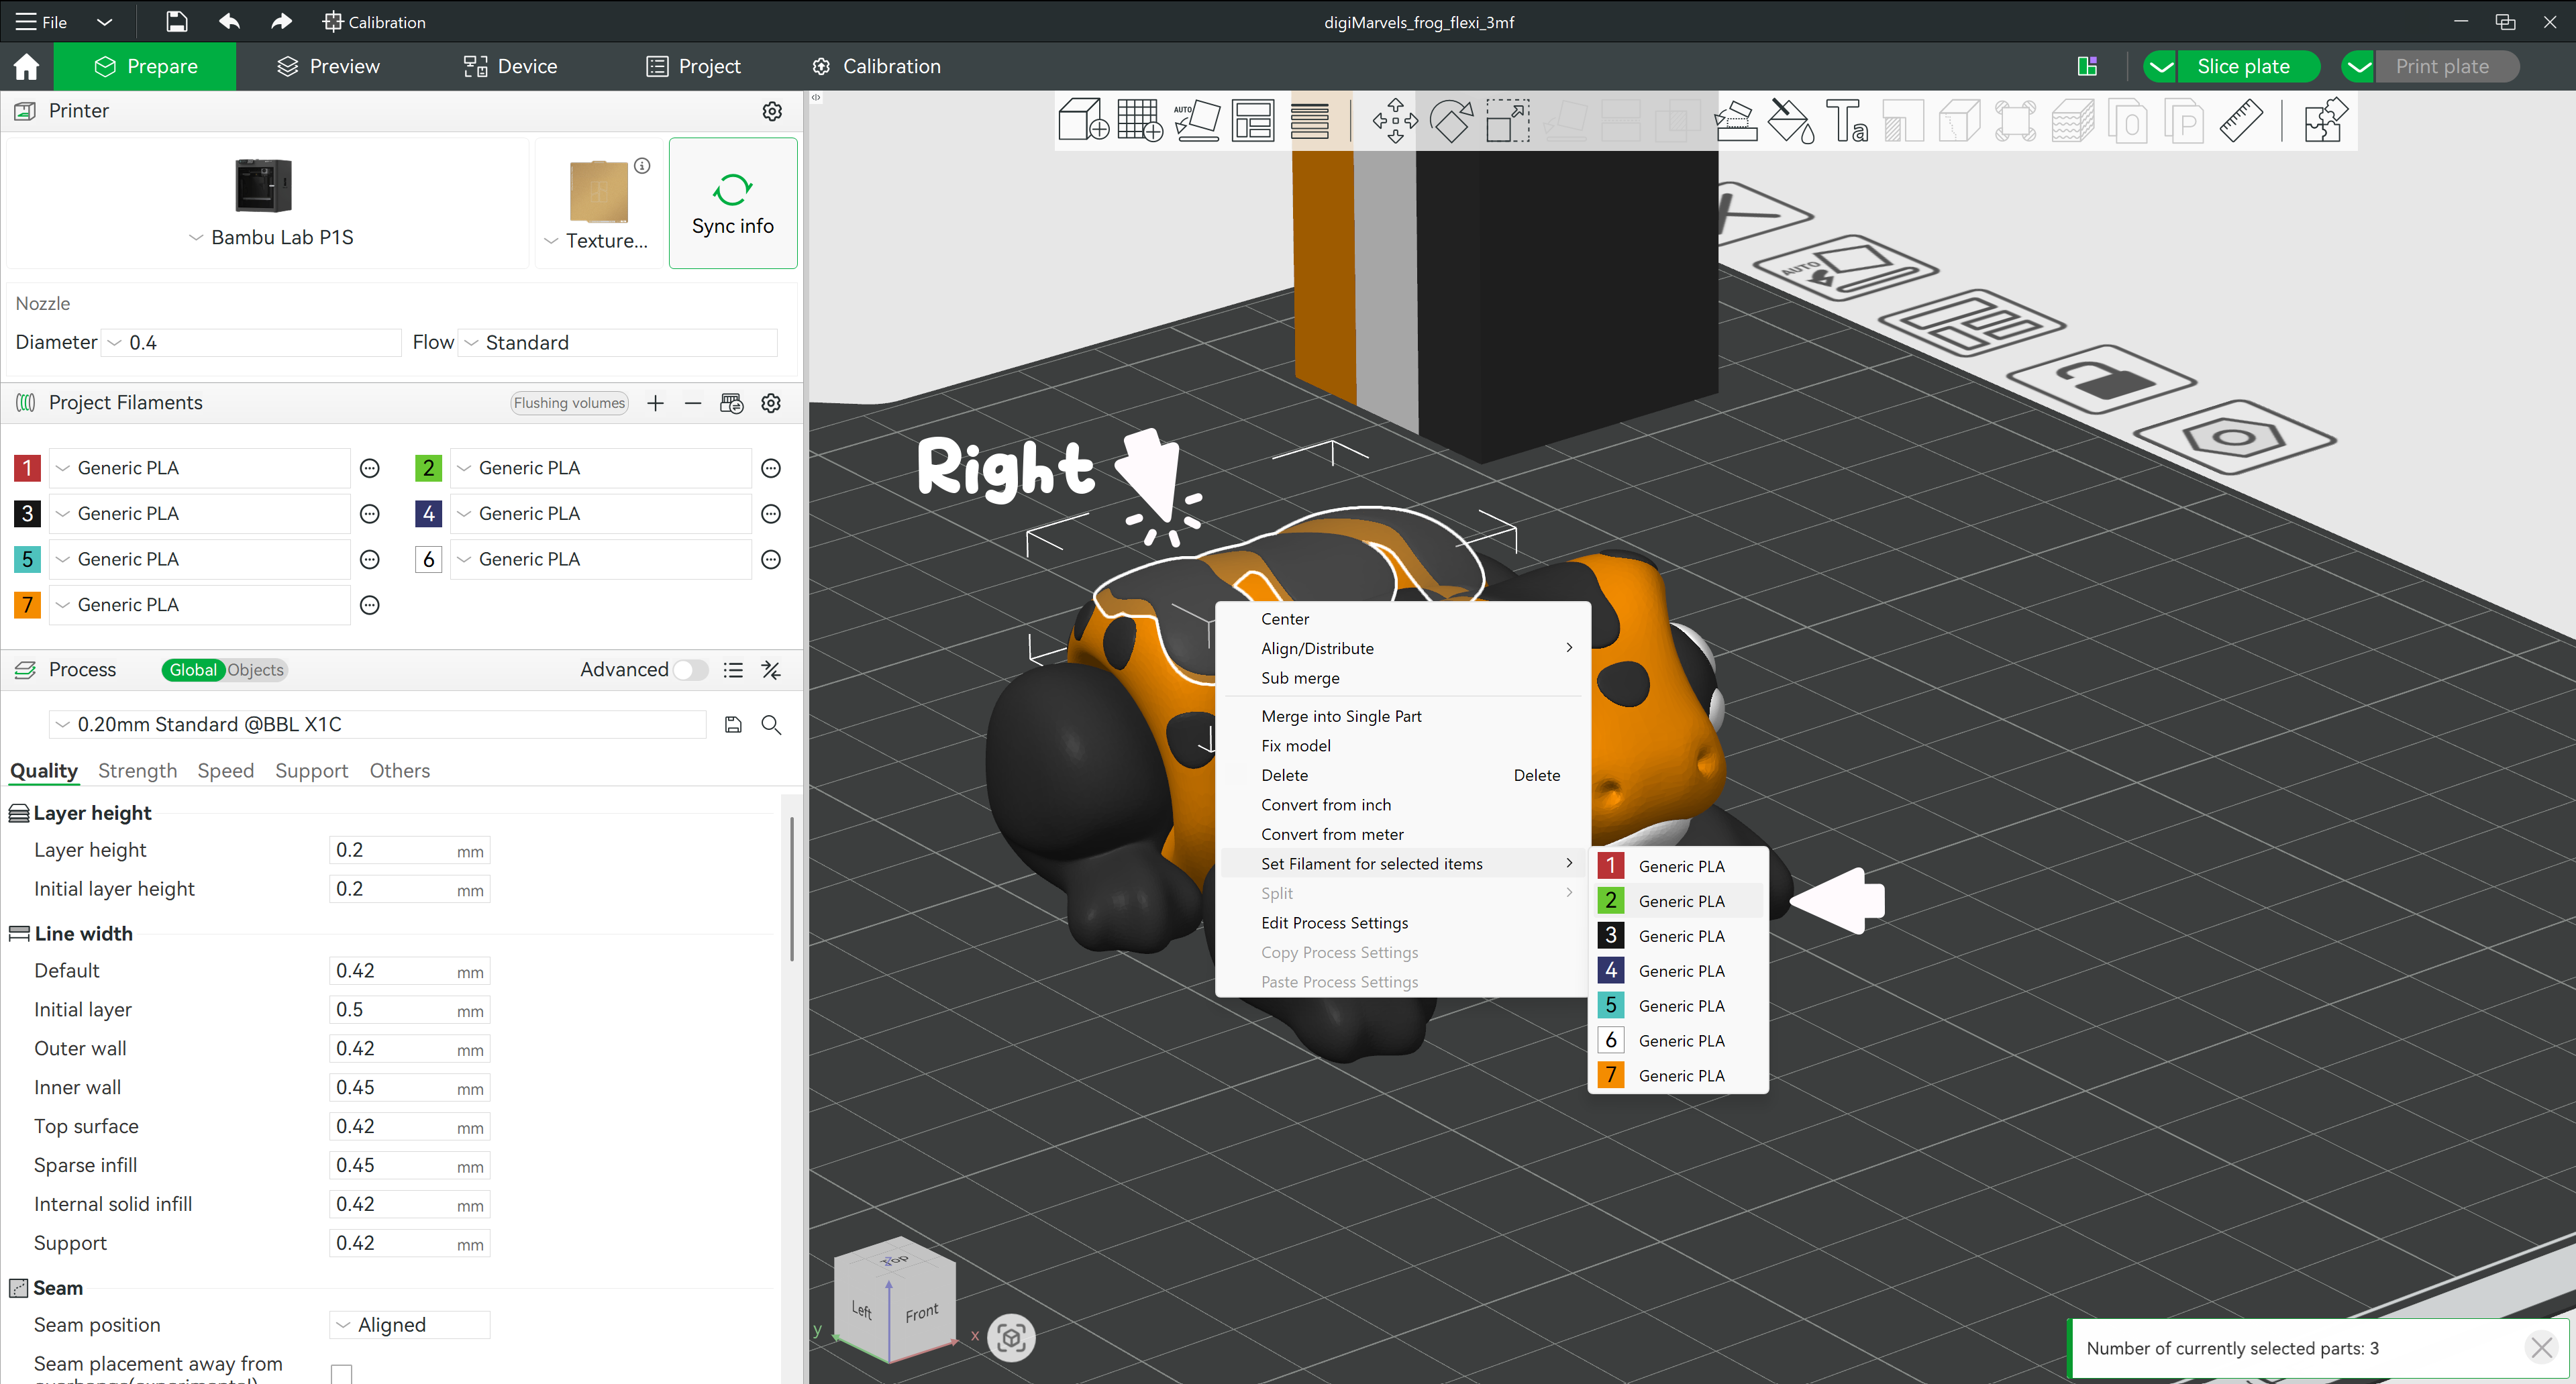
Right-click your selection and choose "Set Filament for selected items", then pick the filament number that matches the colour you want. The filament slots (1, 2, 3…) and their colour swatches are listed in the Filament block on the left sidebar.
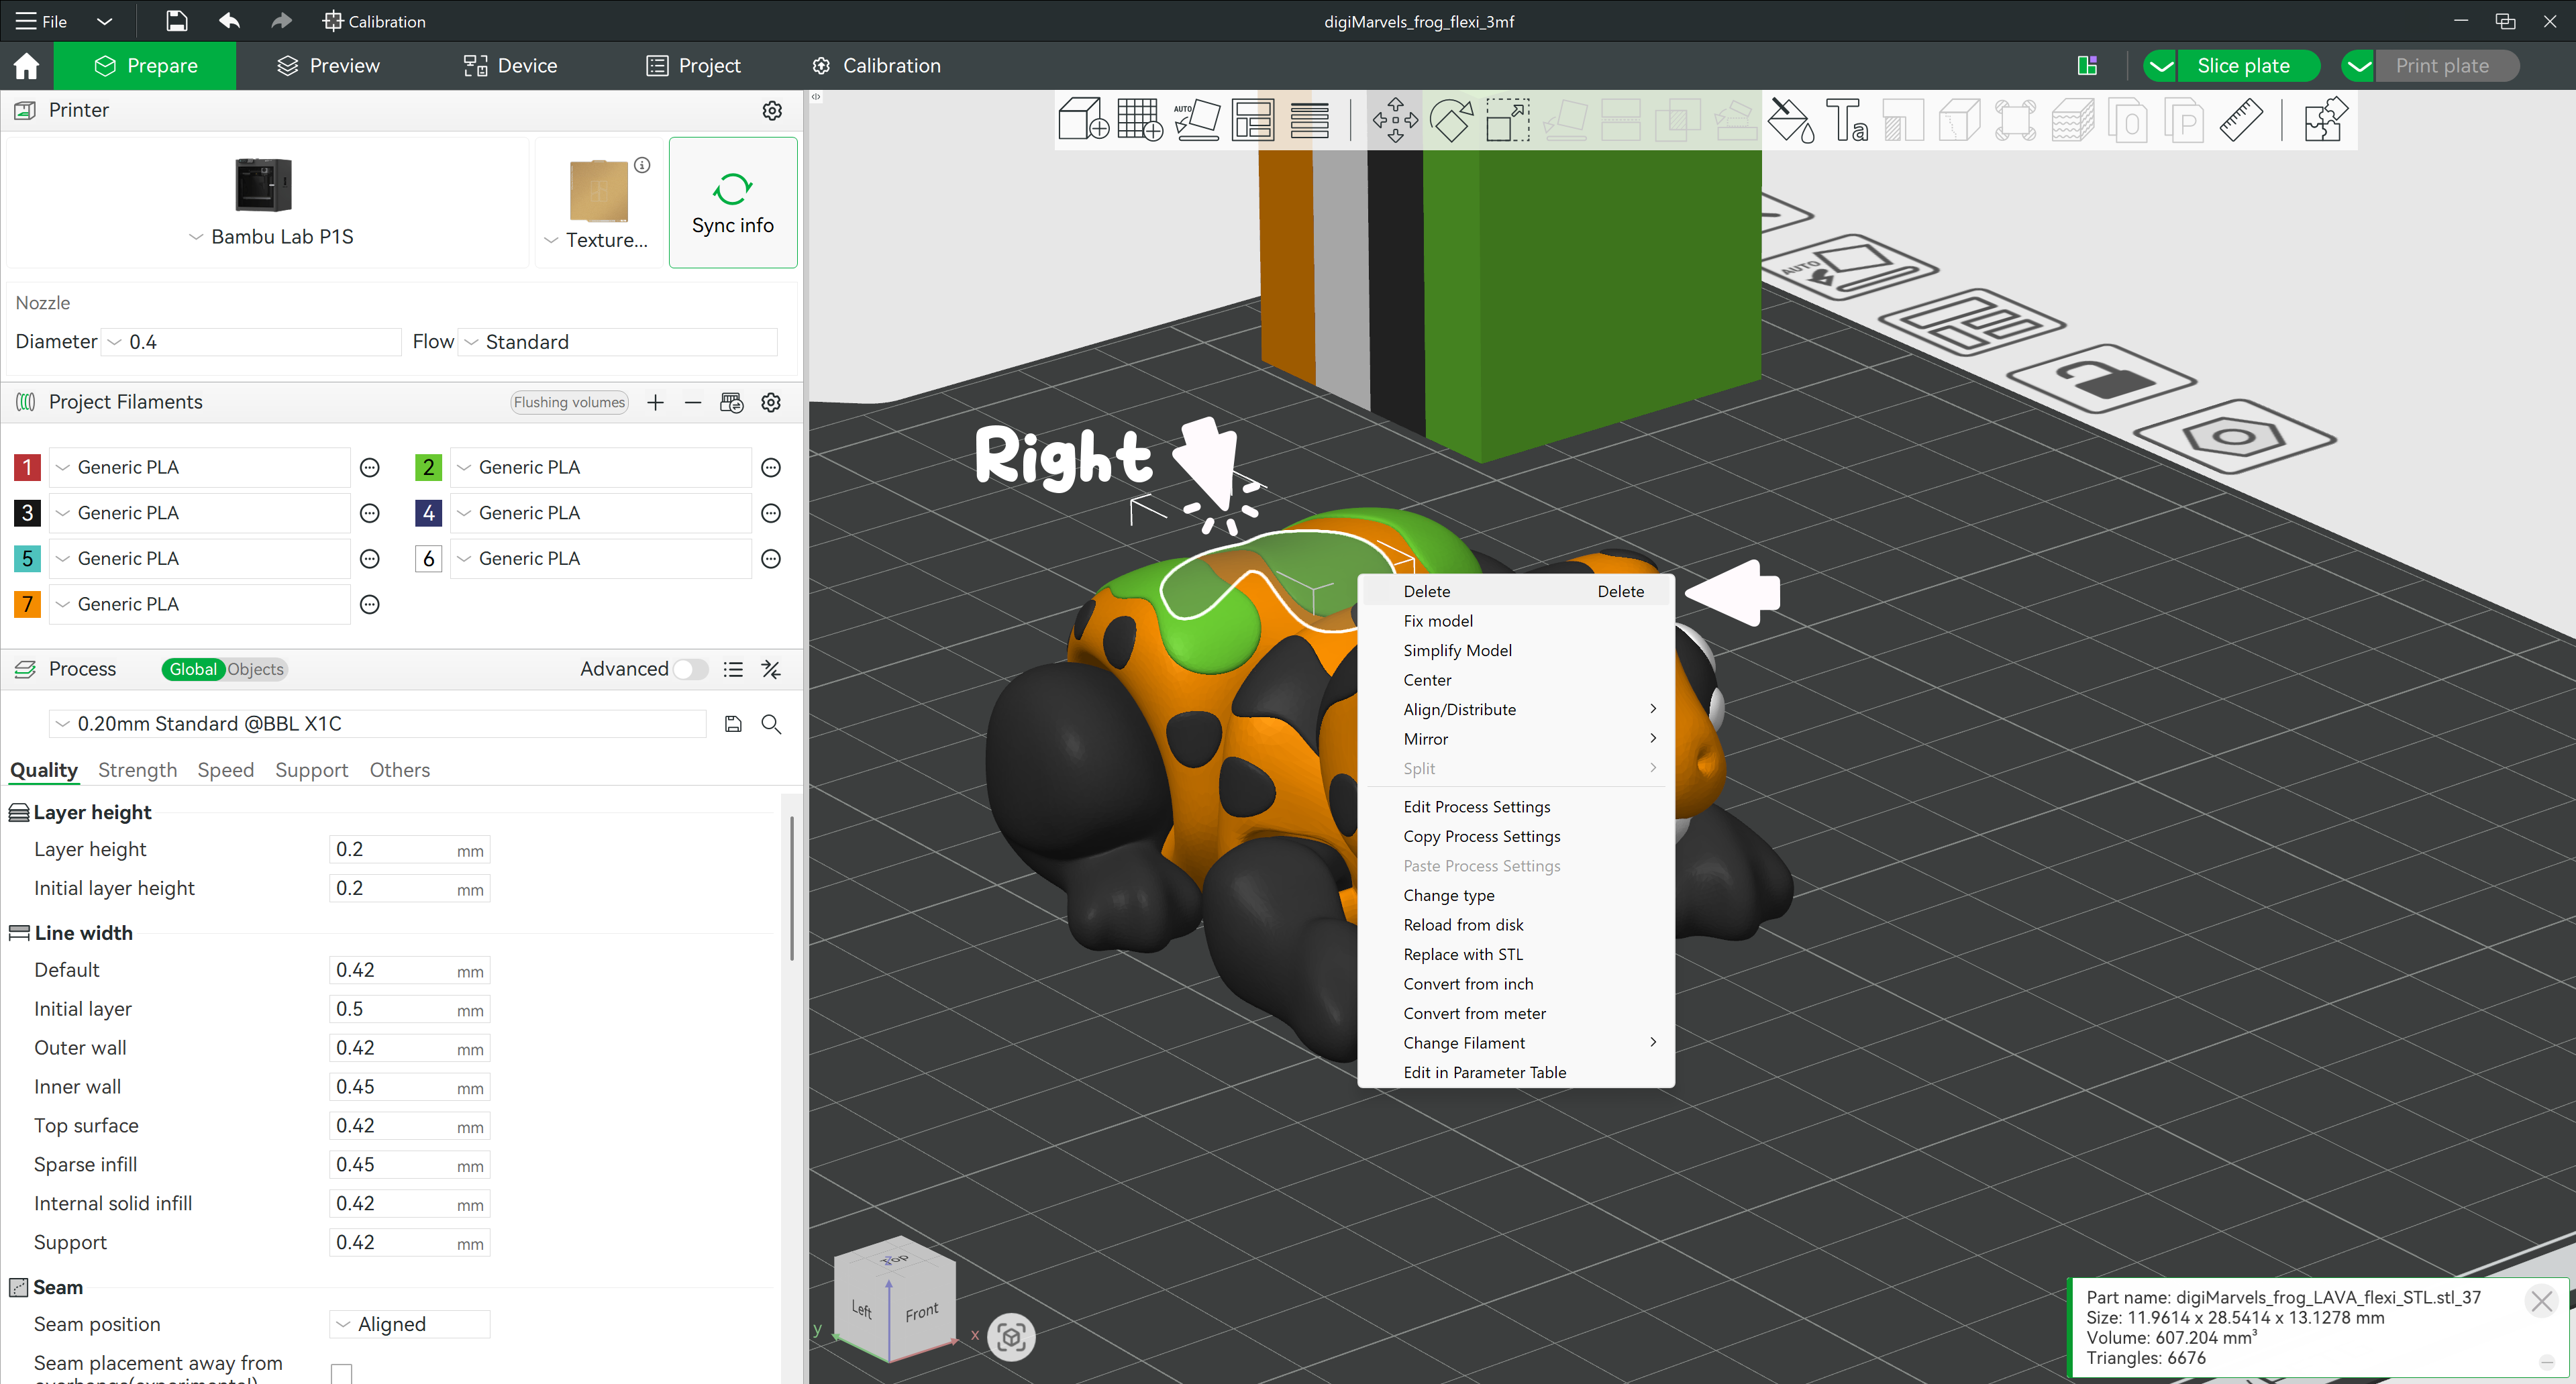
Select the part you want to remove (Alt + Left Click), then right-click → Delete — or press the Delete key. Great for removing spots, eye glares, or other optional details.
You can modify all the animal's print spots, eyes, pupils, and eye glares in the same way. Some models also include ears, pink ear parts, paw parts, and more.
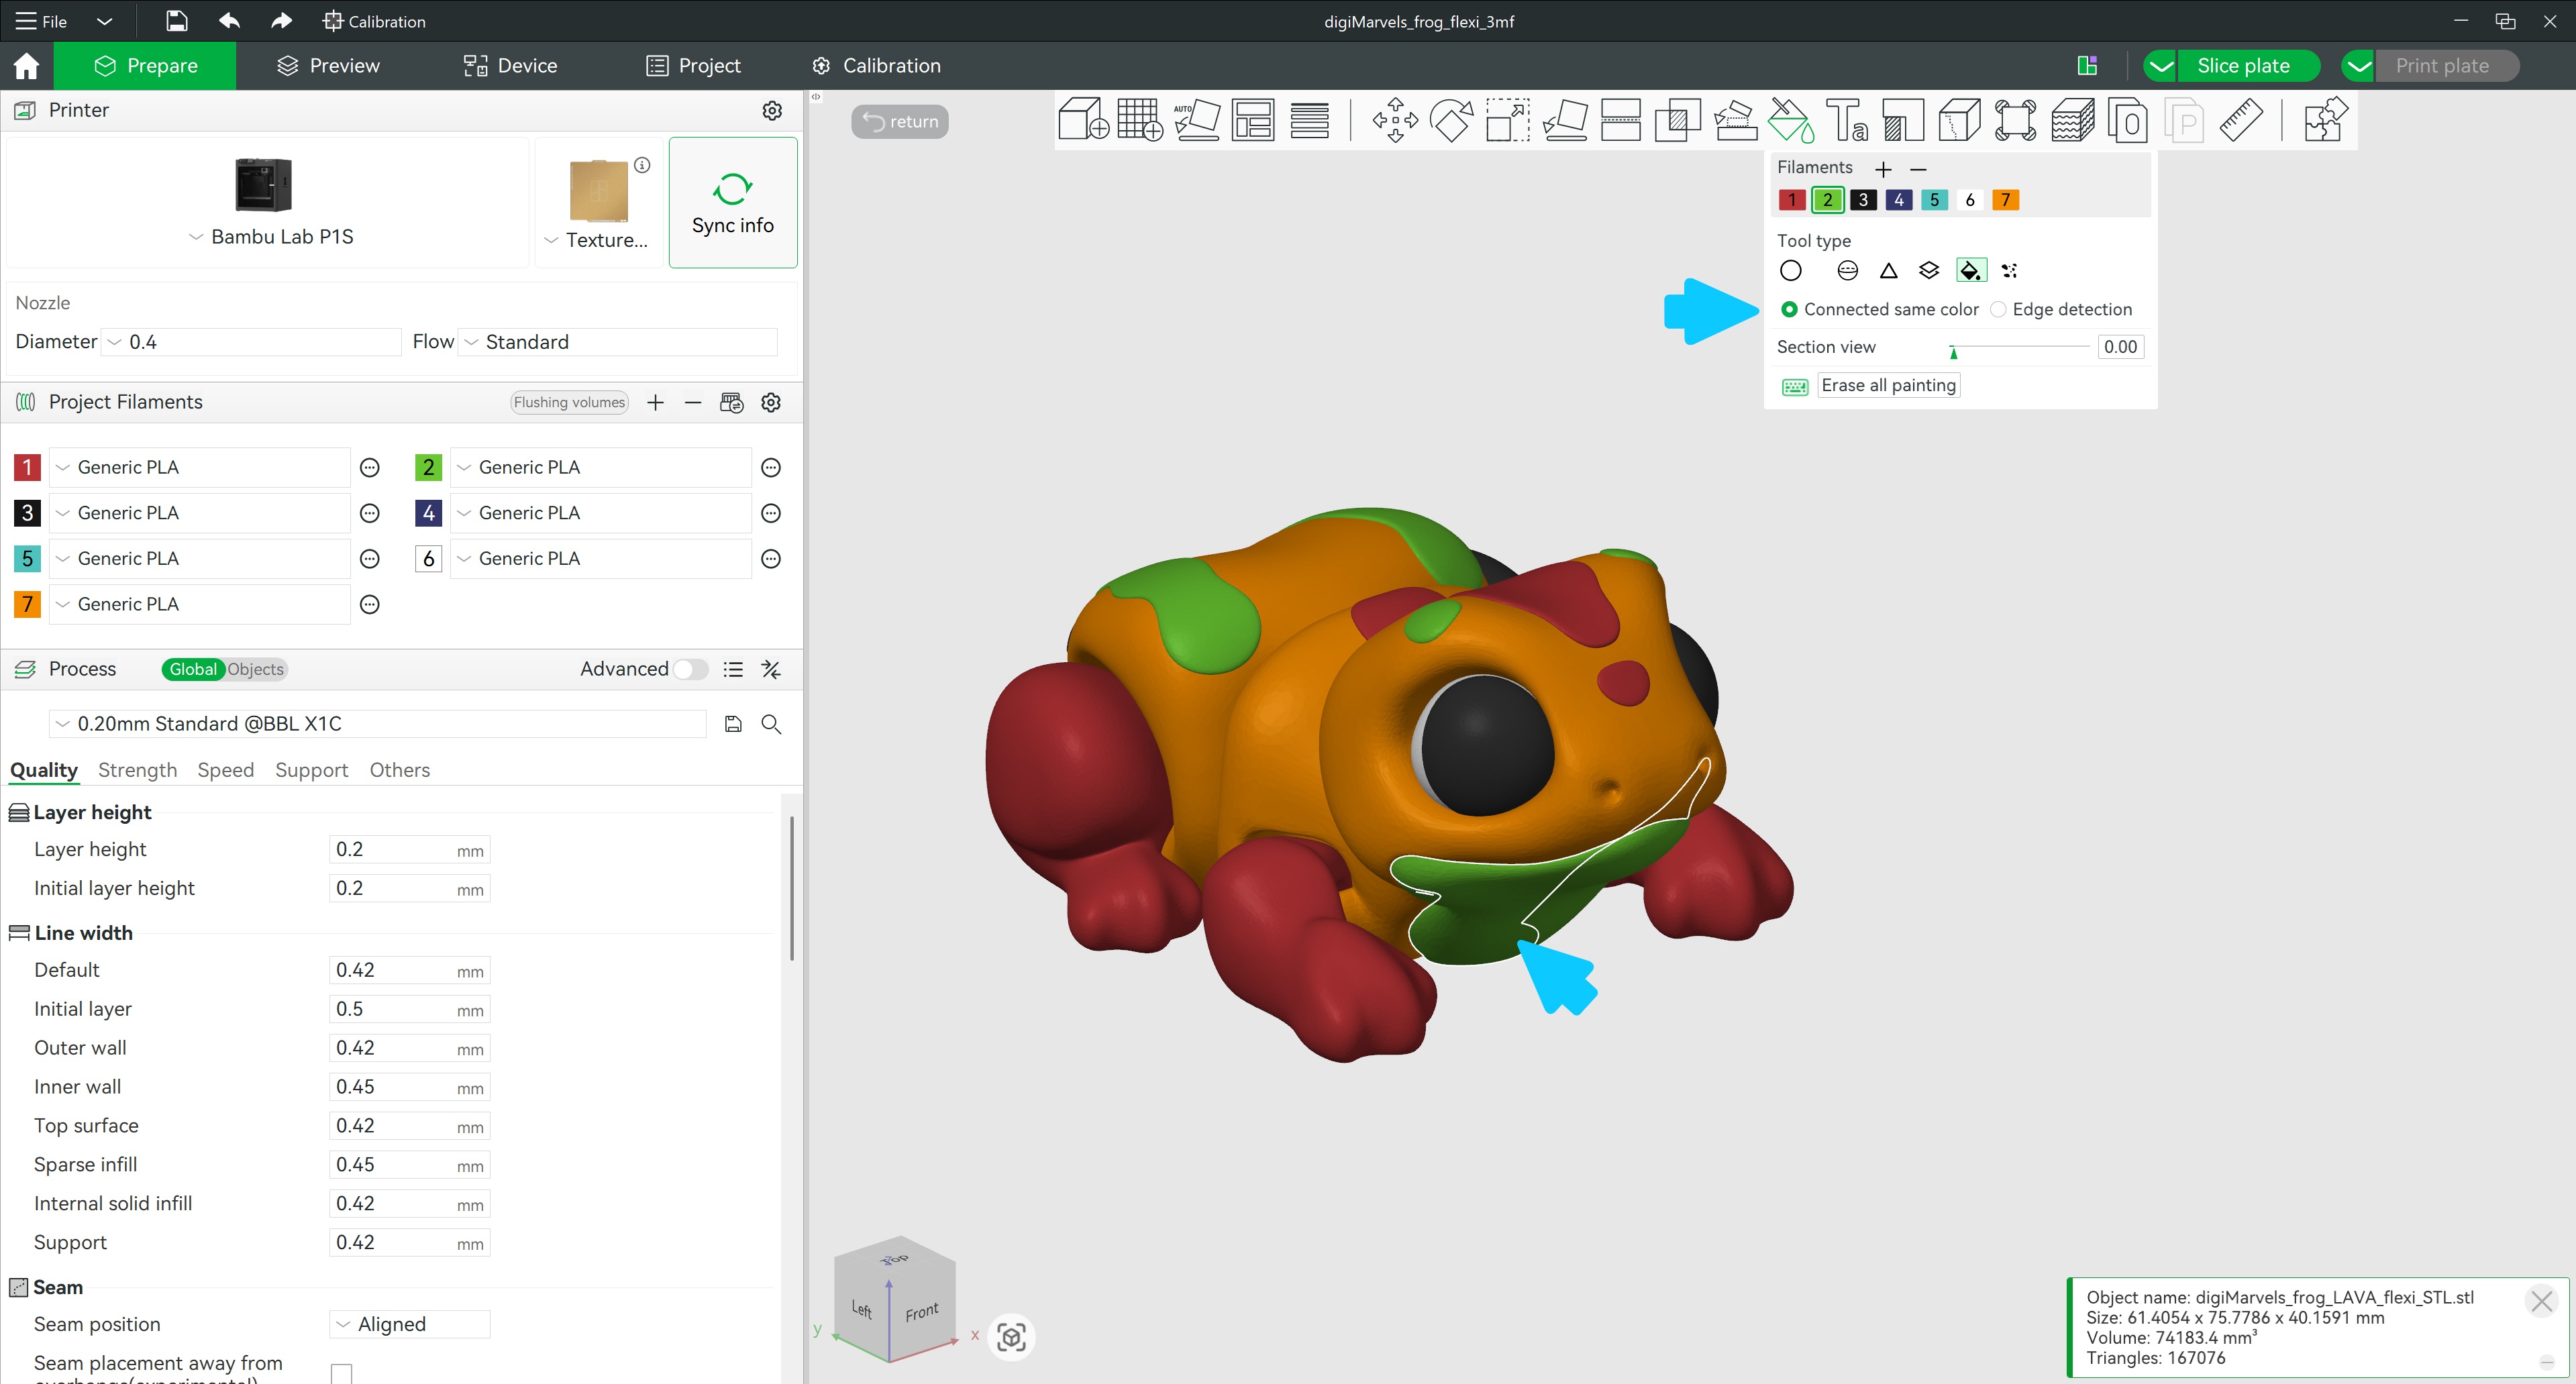
Parts which are not separated from each other you can safely repaint with the Fill Tool.
💡 Tip: When using the Fill Tool, make sure Connected same color mode is selected — it works perfectly with 3MF files.