 Tutorial Guide
Tutorial Guide
Tutorial Guide
Target bed adhesion exactly where it's needed — no full brim, no cleanup mess.
Clicker caps have a very thin and small footprint — the narrow base that touches the print bed. Without good adhesion, edges lift during printing and the cap warps or fails entirely.
Brim Ears add brim exactly where you need it — around the cap base — without covering the entire plate. Less cleanup, better results.
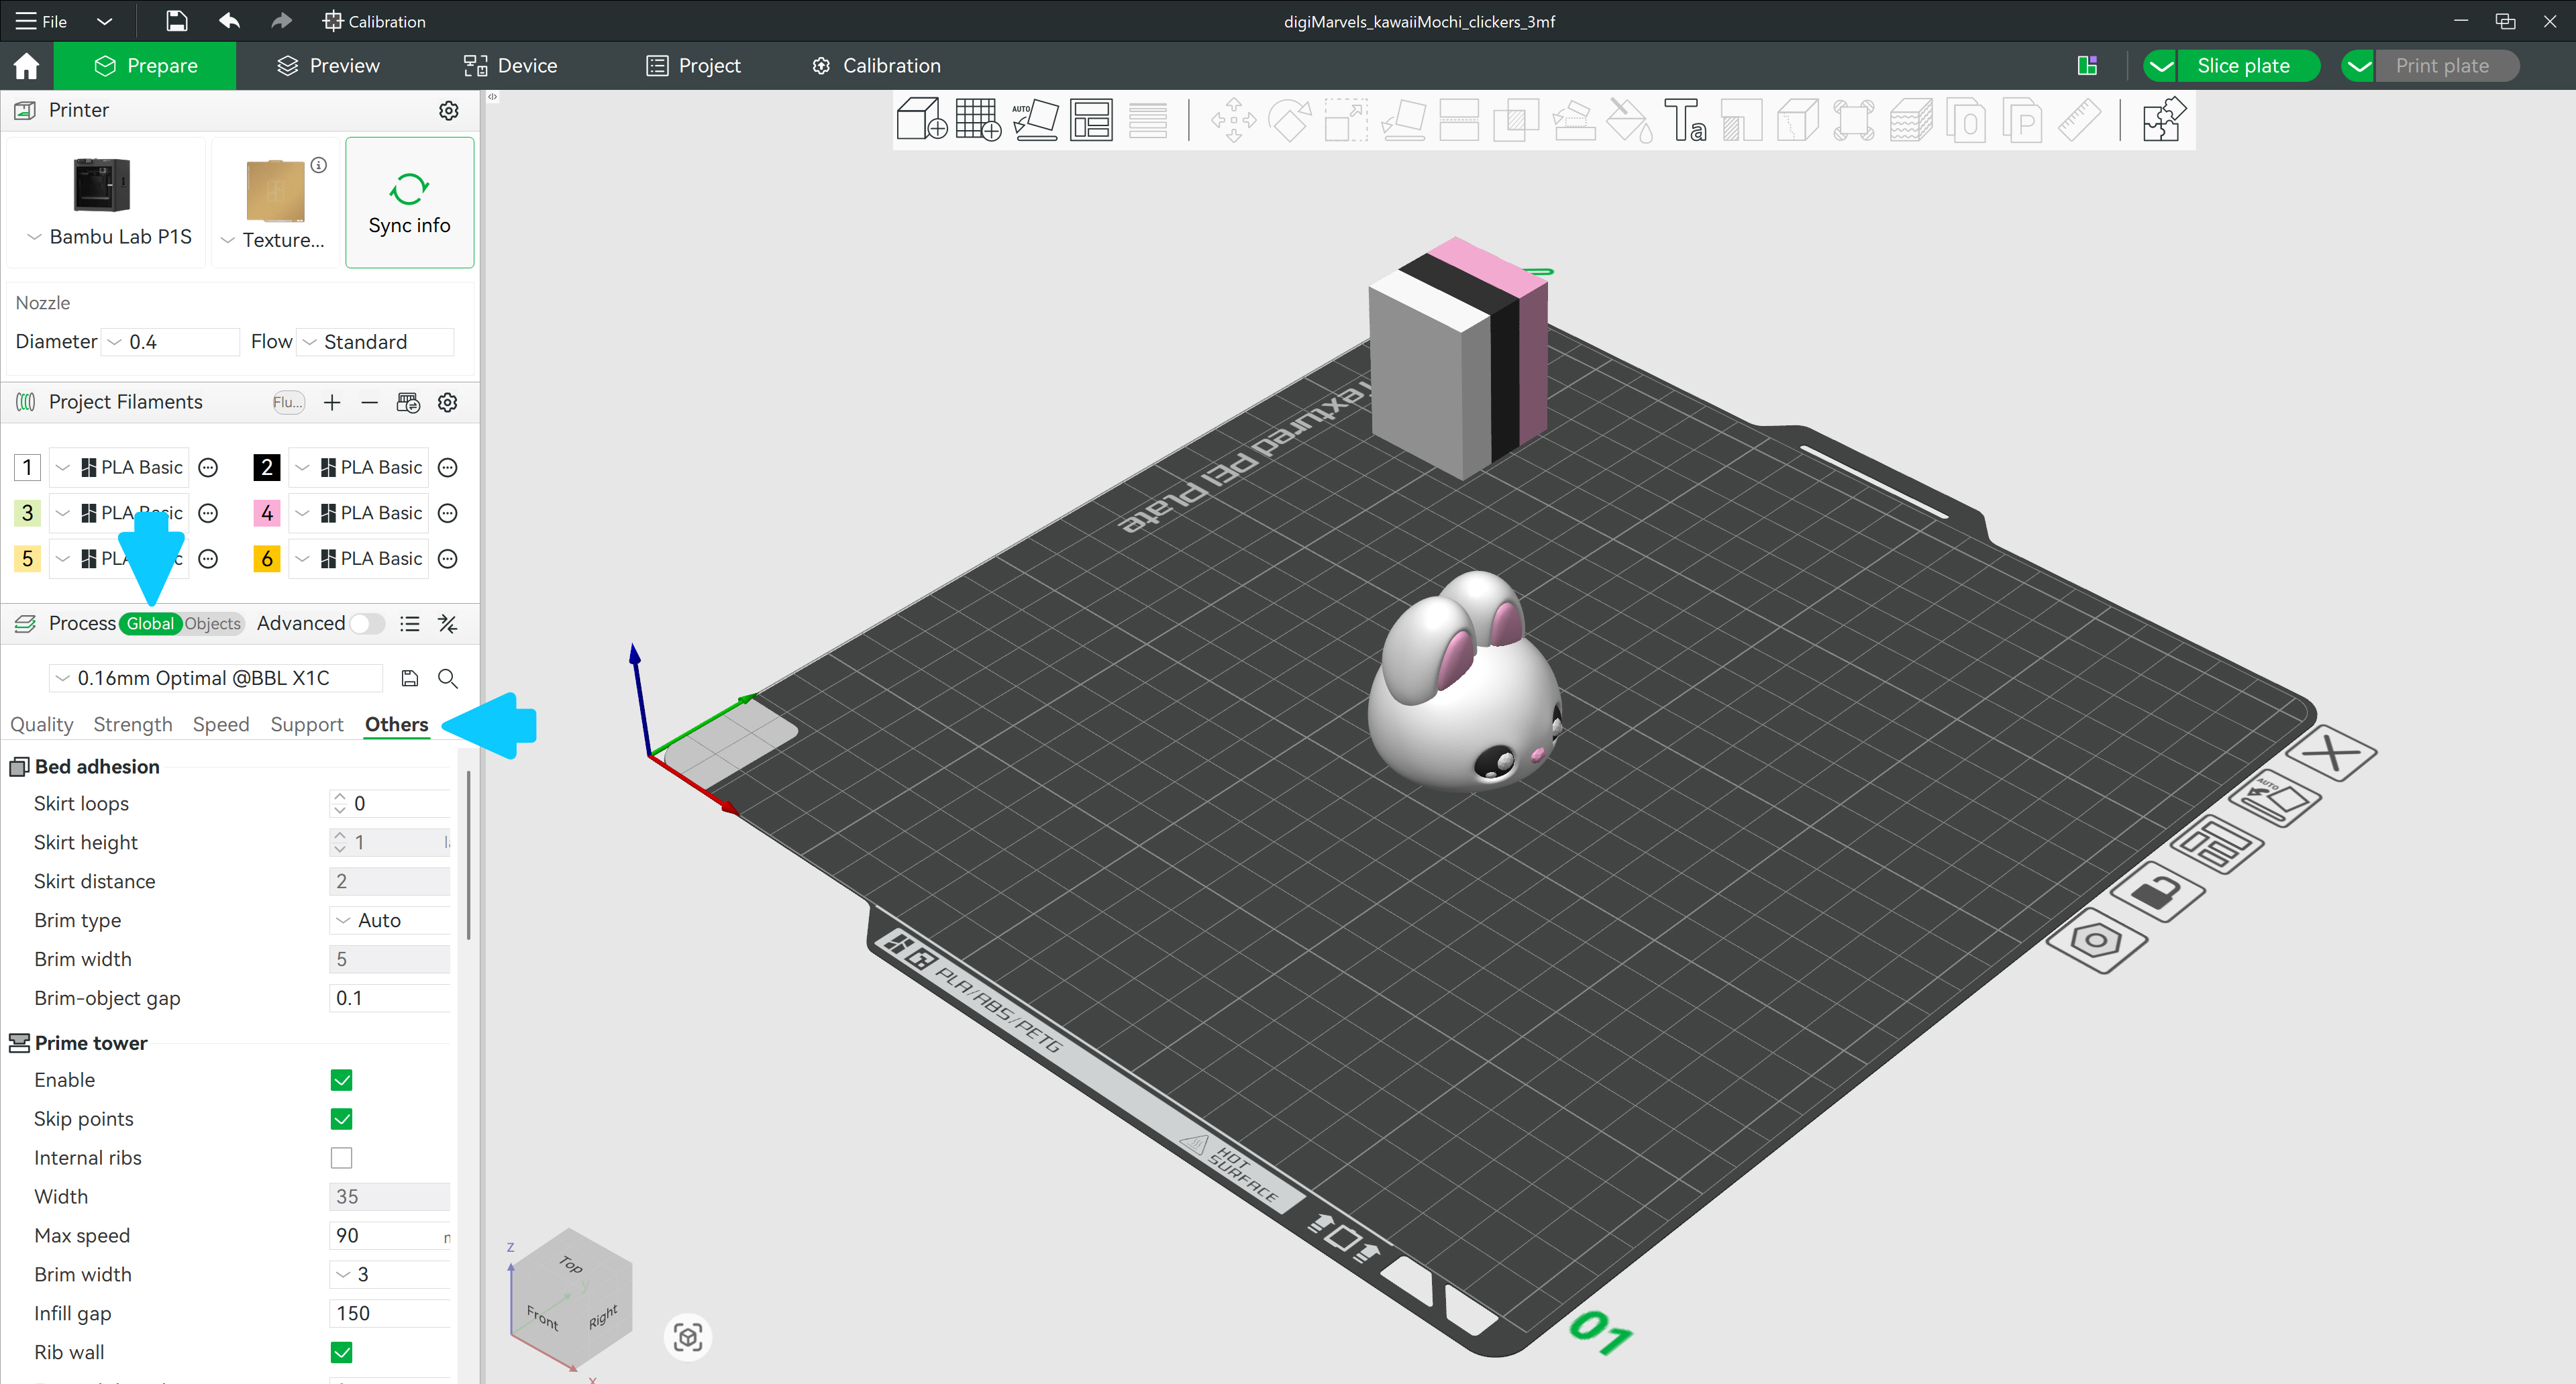
Open your model in Bambu Studio. In the Process panel, make sure you're in Global mode — then click the Others tab.
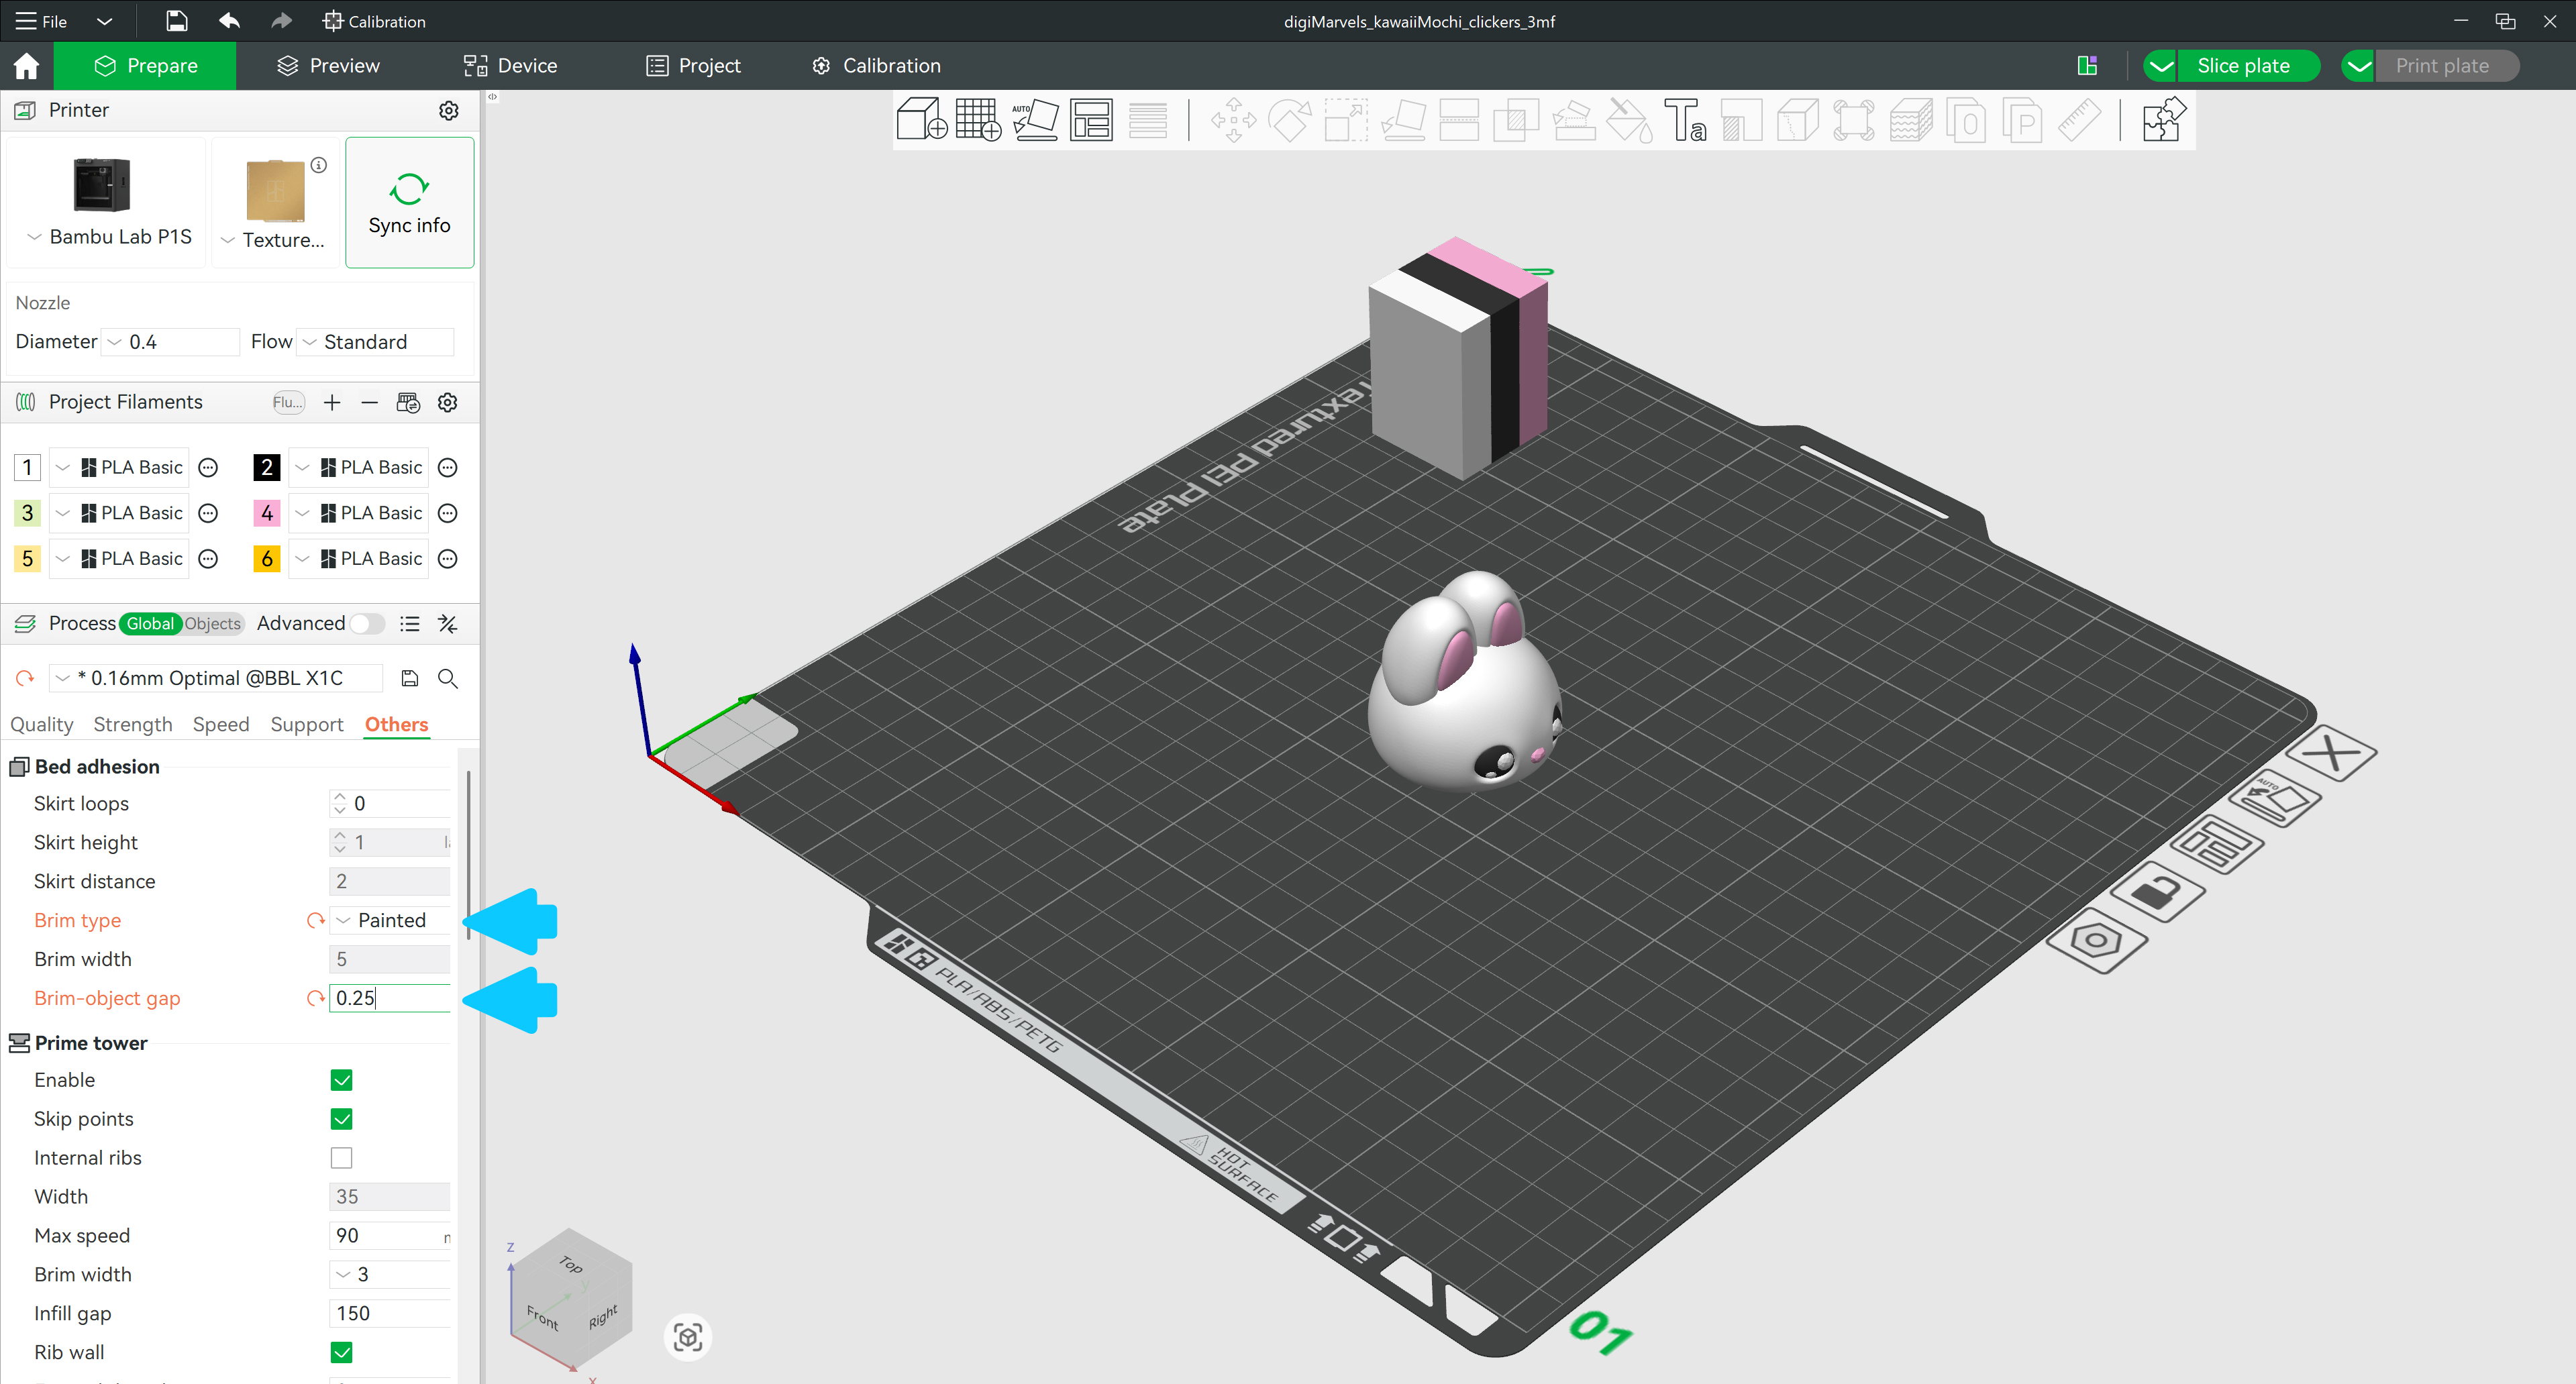
Under Bed Adhesion, set Brim Type to Painted. Then set Brim–object gap to 0.1 mm — the bigger the gap, the easier the brim is to peel off after printing.
Click the model to select it. Then open the Brim Ears tool from the top toolbar — or just press E on your keyboard.

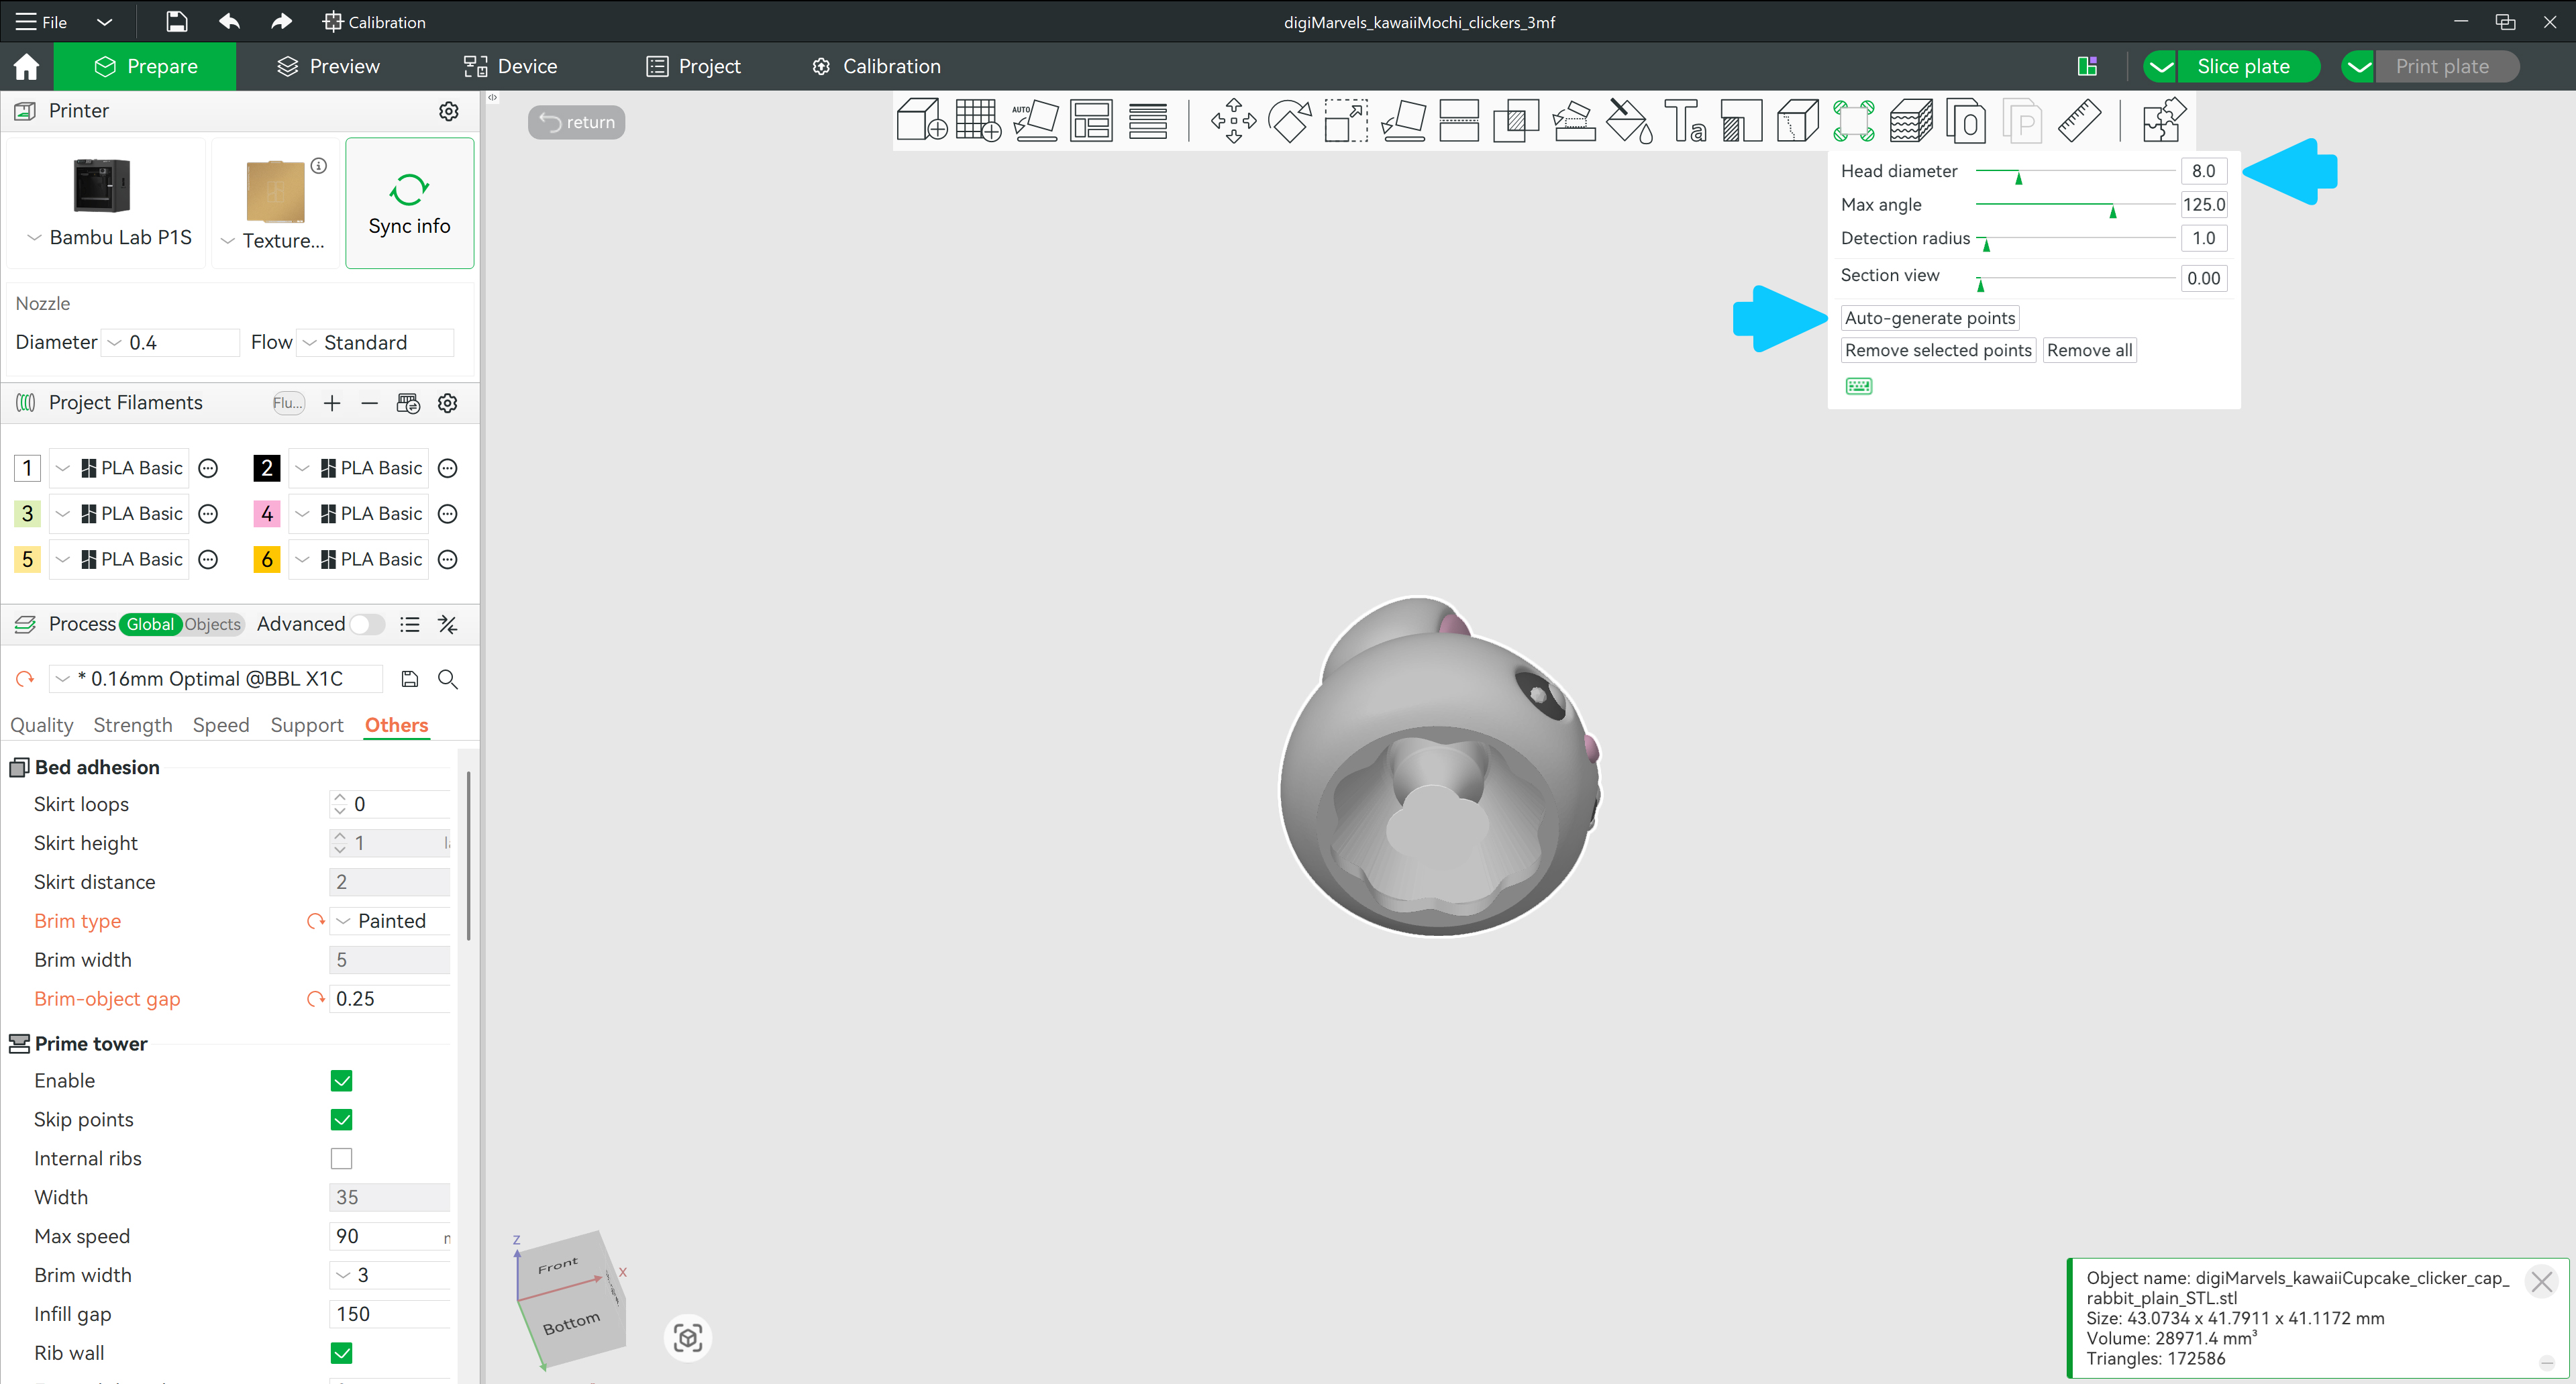
Rotate the model to see the bottom. Choose the Head diameter (use maximum if the cap has a thin base) — then click Auto-generate points. The tool will place brim ears around the base automatically.
Click Slice and switch to the Preview tab. You'll see the brim appear only around the outer edges of the base — right where the ears were placed.
💡 After printing: Peel the brim off from both the outer and inner edges of the cap base — it should come away cleanly. A flat tool helps if it's well-adhered to the bed.
