🐾 Quick Reference Guide

Chinchilla Flexi
Printing Tips

Everything you need to print your Chinchilla Flexi — from slicer settings to colours and customisation.

Chinchilla Flexi – kawaii articulated chinchilla 3D print by DigiMarvels
View on Patreon →
📦 What's Included ⚙️ Settings 🎨 Filaments ✏️ Customise 🔗 Useful Links
📁

Files & Parts

3 STL Files — raw STL · 3 face variants
🐾 Plain Face 🐾 Breed 1 Face 🐾 Breed 2 Face
2 3MF Files — colour presets ready to slice  ▾ preview
🎨 4-Colour Preset 🎨 5-Colour Preset
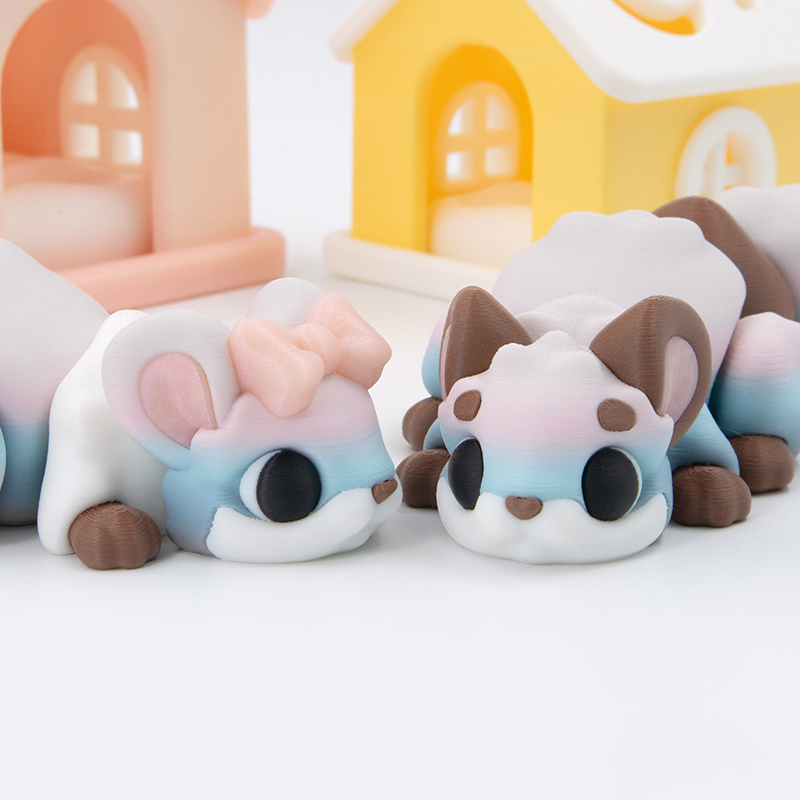
💡 Optional parts — bow, brows, pupils, eye glares, and keyring are already included in the STL files. To remove any of them, use Split to Parts in your slicer, or simply use the 3MF files where parts are already separated.  ▾ preview
💡 Chinchilla is print-in-place — just peel it off the bed and start wiggling!
⚙️

Printing Settings

Layer
0.16 mm
Infill
15% — Gyroid
Walls
2 Loops
Material
Basic PLA
Supports
None — Print-in-Place
Brims
None needed
Scale
Tested down to 60%
🤏 Printing smaller or at 60%? tap to expand
Increase wall loops from 2 → 3 and infill from 15% → 30% — smaller prints need extra structure to keep the joints from being too floppy. Using a softer PLA (Eco PLA, PolyTerra)? Same advice applies.
🎨

Filaments Used

Bambu Lab Basic PLA
White Black
Polymaker Panchroma Celestial PLA
White Pink
Cookiecad Elixir PLA
Pale Pink
Polymaker PolyTerra PLA
Earth Brown
Spectrum Glitter PLA
Silver
Ziro Fast Gradient Matte PLA
Drift Feather
🎨

Editing Colours & Parts

  • Load the 3MF — parts are already split and colour-coded, ready to slice
  • To recolour: Alt + click a part → press the filament slot number on your keyboard (1, 2, 3…) — or select it from the filament list in Object Mode
  • Optional parts — recolour or delete any of these: bow · brows · pupils · eye glares · keyring
  • Can be scaled up or down slightly if needed
Don't use the Fill Paint tool to repaint parts — it can cause messy colour edges. Use colour assignments instead.

👉 Full 3MF guide →
Happy Printing! 🐾