🍭 Quick Reference Guide

Lolli Ring
Printing Tips

Everything you need to print and assemble your Lolli Ring clicker.

Lolli Ring Clicker – kawaii fidget clicker 3D print
View on Patreon →
📦 What's Included ⚙️ Settings 🎨 Filaments ✏️ Customize 🔗 Useful Links
📁

Files, Switch & Assembly

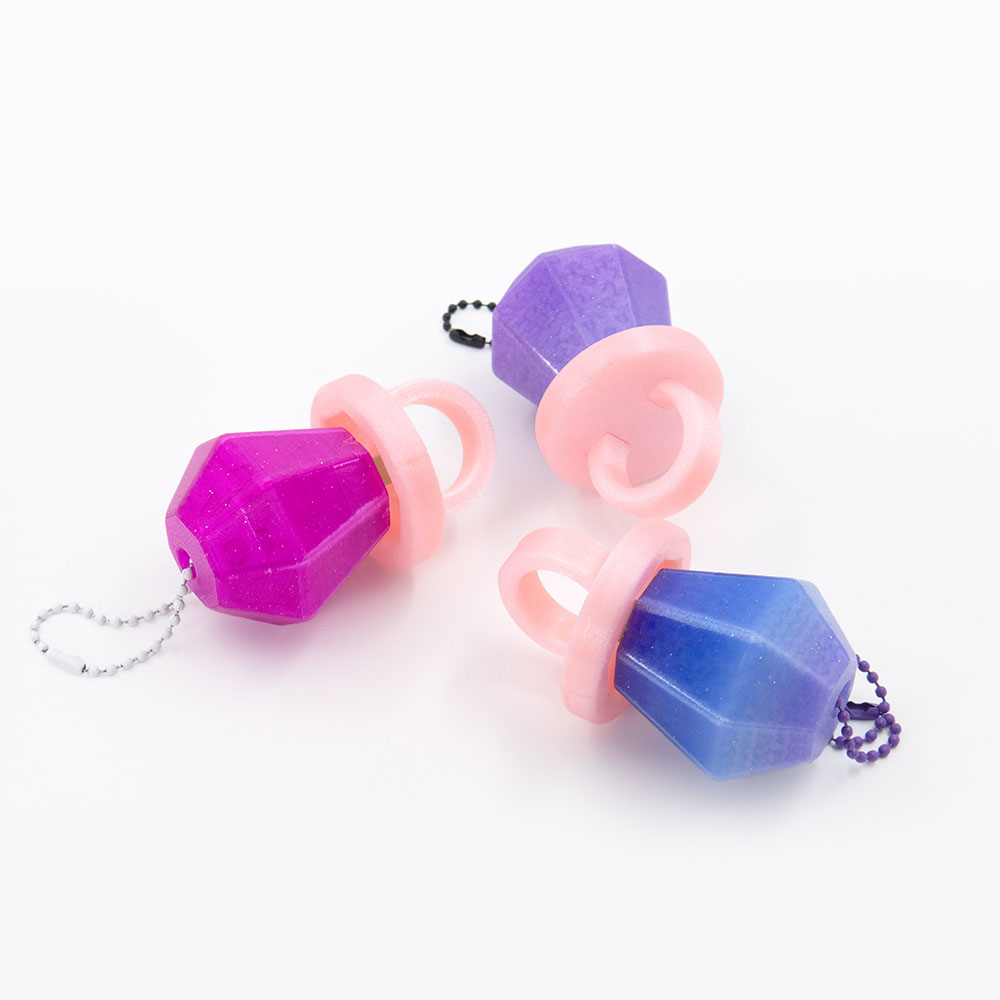
💡 New to printing fidget clickers? This clicker is made of 2 parts. Pick your Candy (Plain or Keychain) and your Ring Base — then print, assemble, and click!
⌨️ Keyboard switch required tap to expand
You'll need a mechanical keyboard switch — it's what creates the click.
Tested switches: Kailh BOX White (crisp, loud), BOX Jade (crunchier, louder), BOX Brown (quiet).
Candy — 2 STL files · holds the keyboard switch (switch snaps in from below)
🍭 Candy 🔑 Candy Keychain
Ring Base — 3 STL files · keyboard switch cap (presses onto the switch stem)
⚙️ Assembly Ring Base + Ring Base Handle — printed separately, then glued
💠 Print-in-place single print  ⚠ supports required
1 3MF File — pre-arranged with colour assignments  ▾ preview
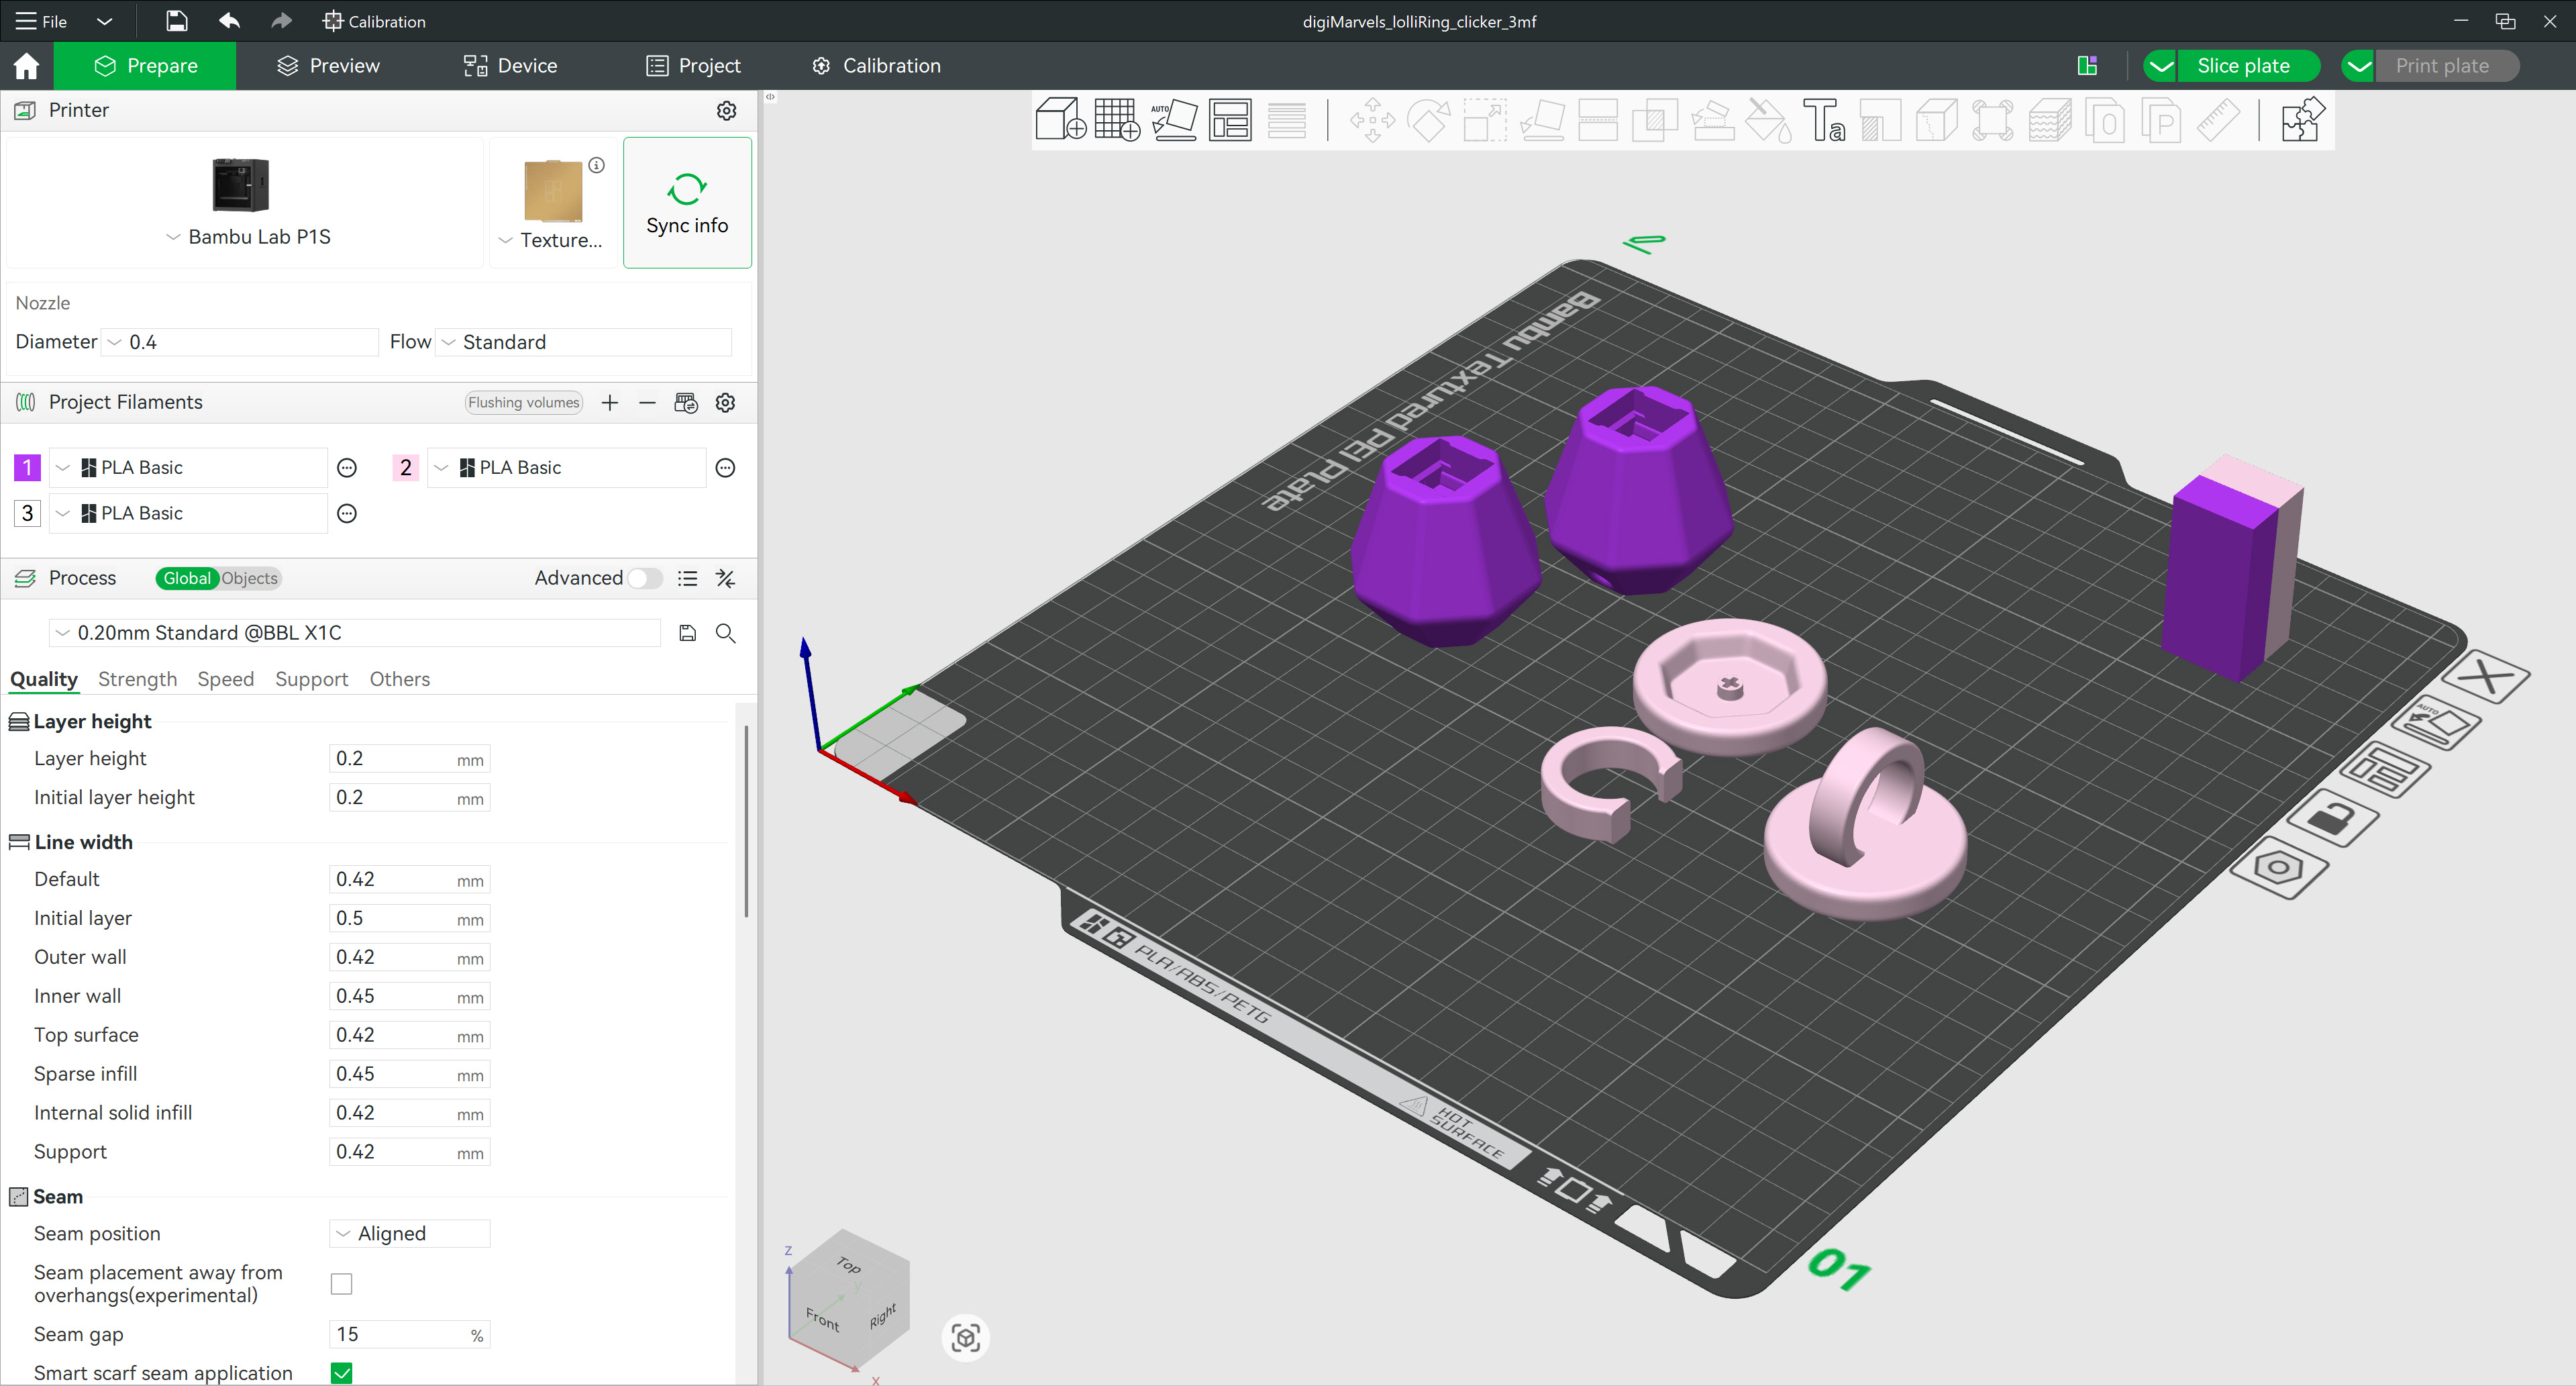
3MF layout preview — Lolli Ring Clicker parts arranged in slicer
Click to enlarge
🍭 Assembly steps tap to expand
1. Add one drop of super glue into the switch hole inside the Candy
2. Insert the switch into the Candy, aligning the pins to the holes
3. Add one drop on top of the keyboard switch stem
4. Press the Ring Base onto the switch stem

Using the Assembly Ring Base? Glue the Ring Base Handle to the Ring Base first.
⚙️

Printing Settings

Layer
0.2 mm
Infill
15% — Gyroid
Walls
2 Loops
Material
Basic PLA
Supports
Not required
print-in-place ring requires supports
Brims
Not required
🪲 Part lifting off the bed? tap to expand
Add Brim Ears to the part or/and increase the bed temperature by 5+ °C.
🎨

Filaments Used

Smooth translucent PLA works great to create a lollipop effect. Any basic PLA works great too!
Cookiecad Elixir
Mint Green Pale Blue Pixie Dust Pale Pink Solar Flare
Polymaker Panchroma Celestial
Pink Light Yellow
Ziro Gradient Twinkling
Lavender
✨ Want a shinier finish? tap to expand
Decrease your outer wall printing speed to 60 mm/s or below — slower speeds give the surface more time to settle smoothly.
🎨

Editing Colours & Parts

⚠️ Do not scale the model — it will break the fit between parts and the switch won't seat correctly.
  • Open the 3MF file — parts are pre-separated with suggested colours
  • Assign filament slots to each part, then slice
🤔 Not sure how to edit the 3MF? There is a step-by-step guide for you. See guide →
Happy Printing! 🍭