🍳 Quick Reference Guide

Egg Buddy Clicker
Printing Tips

Everything you need to print and assemble your Egg Buddy Clicker fidget toy.

Egg Buddy Clicker – kawaii fried egg fidget clicker 3D print by DigiMarvels
View on Patreon →
📦 What's Included ⚙️ Settings 🎨 Filaments ✏️ Customize 🔗 Useful Links
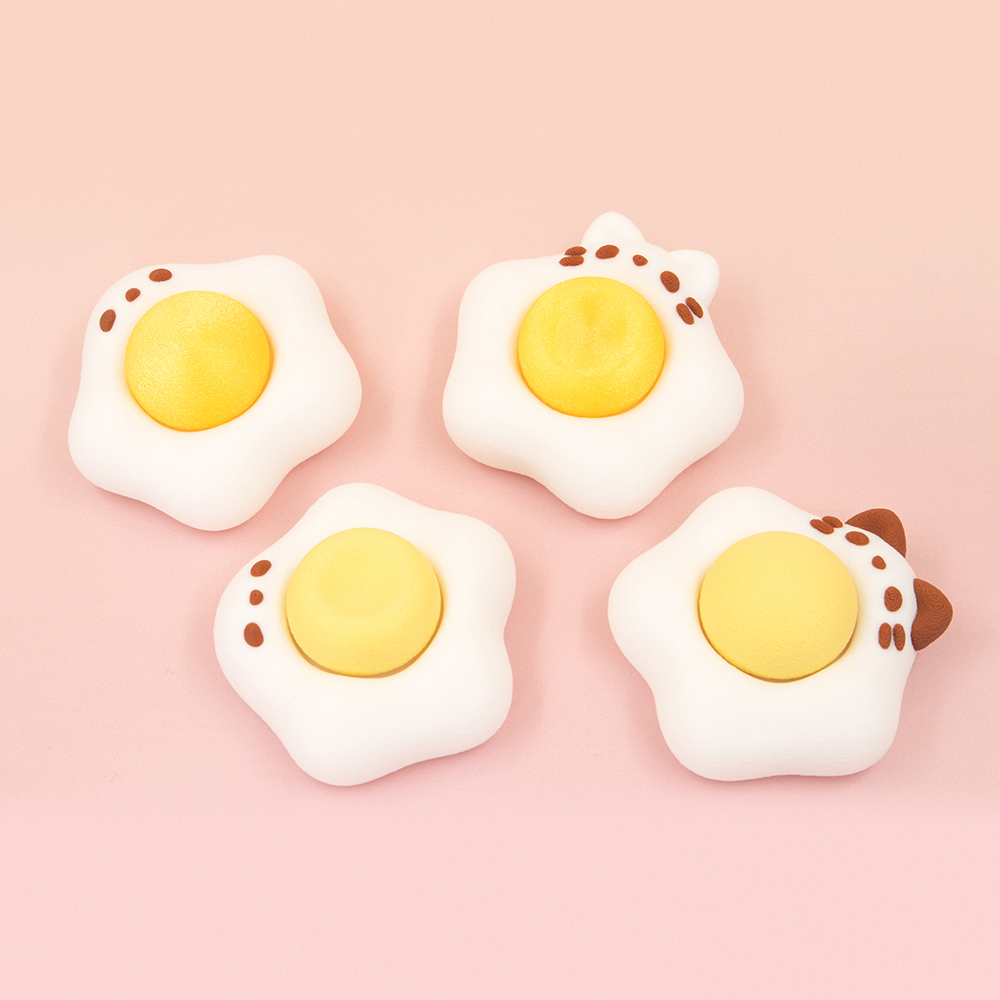
💡 New to printing fidget clickers? This clicker is made of 2 parts — pick your Egg White Base and your Yolk Cap, then print, insert a keyboard switch, and click!
⌨️ Keyboard switch required tap to expand
You'll need a mechanical keyboard switch — it's what creates the click.
Tested switches: Kailh BOX White (crisp, loud), BOX Jade (crunchier, louder), BOX Brown (quiet).
🍳
Egg White Base 6 STL FILES
Holds the keyboard switch. Pick your favorite face — all 3 also available as keychains.
🐱 Cat Face 😊 Smile Face 🥺 Sad Face 🔑 Keychain of each
🟡
Yolk Caps 2 STL FILES
Presses onto the switch stem.
🟡 Round Yolk 🍳 Squished Yolk
📦
3MF File 1 FILE ▾ preview
All parts pre-arranged with color assignments — ready to slice.
🍳 Assembly steps tap to expand
1. Add one drop of super glue into the switch hole inside the Egg White Base
2. Insert the switch into the Base, aligning the pins to the holes
3. Add one drop of super glue on top of the keyboard switch stem
4. Press the Yolk Cap firmly onto the switch stem
⚙️

Printing Settings

Layer
0.16 mm
Infill
15% — Gyroid
Walls
2 Loops
Material
Basic PLA
Brims
Recommended for the Yolk Cap
Fuzzy Skin
BASE Contour Point dist 0.3 mm · Thickness 0.2 mm
YOLK Painted ▾ preview Point dist 0.3 mm · Thickness 0.2 mm
💡 Using fuzzy skin? Set Seam → Random — it hides the seam line in the texture for a much nicer finish.
🪲 Part lifting off the bed? tap to expand
Add Brim Ears to the part and/or increase the bed temperature by 5+ °C.
🎨

Filaments Used

Bambu Lab Basic PLA
White Brown
Cookiecad Elixir PLA
Solar Flare
Polymaker PolyTerra PLA
Banana Yellow
✨ Want a shinier finish? tap to expand
Decrease your outer wall printing speed to 60 mm/s or below — slower speeds give the surface more time to settle smoothly.
📌 Do not scale the whole model — clickers are not suitable for scaling. It will break the fit between parts and the switch won't seat correctly.
📂
Open the 3MF file
Parts are pre-separated with suggested color assignments — you can start tweaking right away.
🎨
Recolor a part
Alt + Left Click the part, then press 1 2 3 … on your keyboard
Or select it from the filament list in Object Mode. ▾ preview
📏
Fine-tune optional parts
Cat ears and face details can be slightly scaled up or down to taste.
Alt + Left Click the part → use the Scale tool
Skip the Fill Paint tool — it can leave messy color edges. Use color assignments (the steps above) instead.
Happy Printing! 🍳